When you first get into photography, it’s easy to feel like you need everything.
You hear people talking about ND filters, graduated filters, polarising filters… and before long, it feels like you need a whole bag of them just to take a decent photo.
I went through that phase myself.
📌 TL;DR — What Filters Do You Actually Need?
- Essential: Circular polarising filter — cuts reflections and improves colour in a way you can’t replicate in post.
- Useful: ND filters — great for long exposures, but not strictly necessary for most situations.
- Mostly Obsolete: Graduated ND filters — modern dynamic range and bracketing make these largely unnecessary.
- Creative Only: Black mist filters — fun for a specific look, but not essential.
- Not Needed: UV/protection filters — I’d skip them for everyday use and rely on lens hoods instead.
This article contains affiliate links. If you purchase through these links, I may earn a small commission at no extra cost to you. I only recommend products I use and trust.
Why I Don’t Use Graduated ND Filters Anymore
Back when I was working as a professional landscape photographer, I carried a full Lee Filters system — graduated ND filters (both soft and hard edge), ND filters of different strengths, and a polariser that rarely left my lens.
But things have changed.
Dynamic range has improved, and bracketing is now faster and far easier to use in the field. The way I shoot has become much simpler as a result. Most cameras that I now use – from my Nikon Z6III to the Fuji X-T5 have pretty well-implemented bracketing options.
These days, there’s only one filter I consider essential — and even that depends on the situation. There’s another I still use occasionally. Everything else? Either replaceable, or unnecessary.
When I was shooting with the Canon 5D Mark II, bracketing was far more limited than it is today — just three exposures. If I wanted more flexibility, I had to do it manually, which slowed everything down.
Because of that, I relied heavily on my Lee Filters system.
That meant attaching the filter holder, choosing the right strength, and deciding between hard or soft graduated ND filters depending on the scene — hard edge for flat horizons, soft edge for a more gradual transition. More often than not, it involved trial and error. I’d take a shot, adjust, swap filters, and try again.
It worked, but it wasn’t quick.
At the time, the limited dynamic range of cameras and the more awkward HDR workflows pushed me toward using physical filters in the field. It was the most reliable way to get a balanced exposure.
Now, that’s changed.
Bracketing on modern cameras — whether it’s the Nikon Z system or Fuji X-series — is faster, more flexible, and something I actually use without thinking. Combined with how much quicker and cleaner editing has become, the whole process is far simpler than it used to be.
The One Essential Filter for Photography
There’s only one filter I consider essential today — and even then, it’s not something I use on every shot. The reason it stands apart is simple: its effect can’t be properly replicated in post. That filter is a circular polariser.
Why a Circular Polariser?
It does two things exceptionally well.
First, when the sun is off to your side, it boosts saturation and gives your images more punch — deeper blue skies, richer greens, and better overall contrast in your landscape shots.
But the more important reason is this: it cuts reflections.
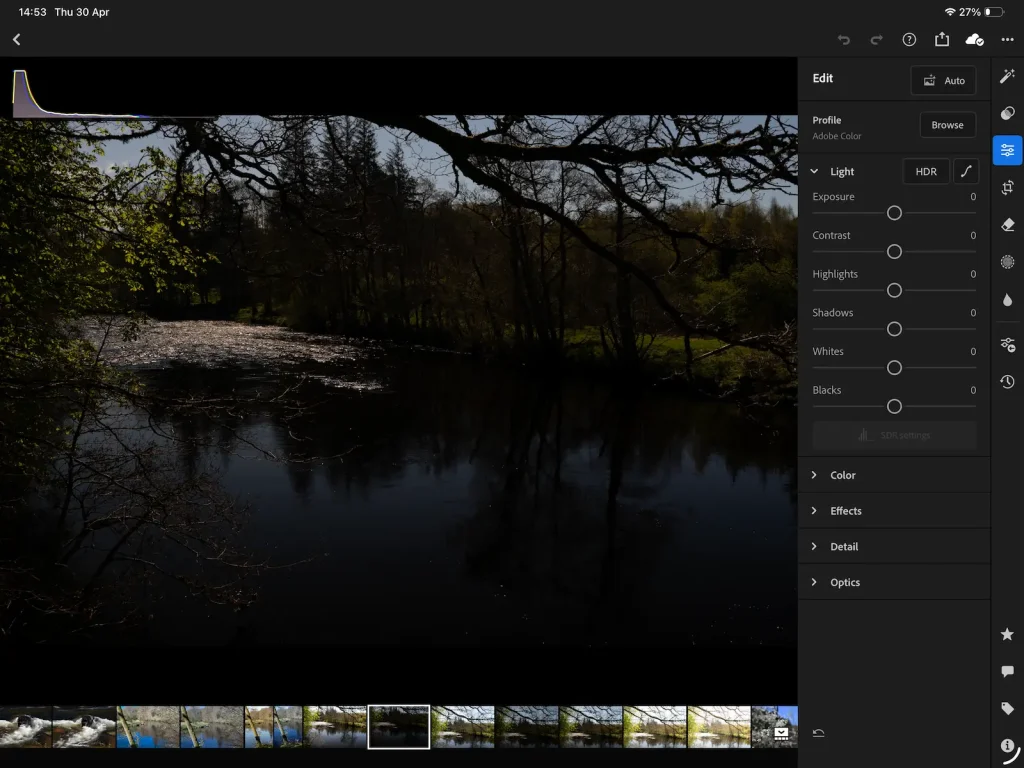
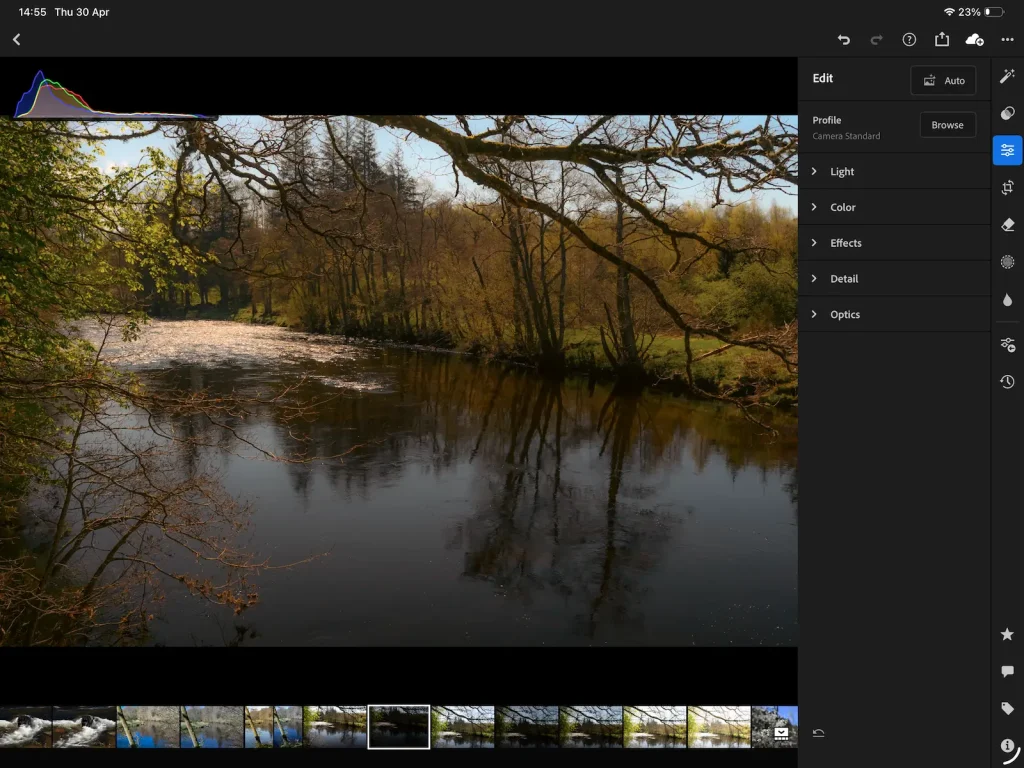
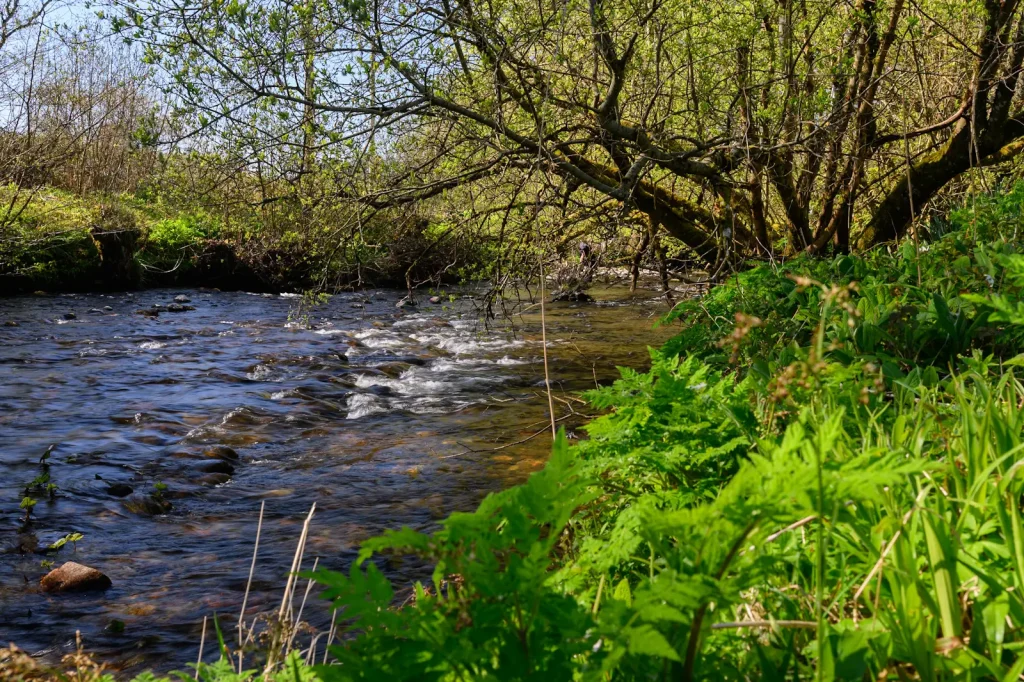
When you shoot water without a polariser, reflections dominate. You lose detail and colour beneath the surface, and highlights can become harsh and distracting. Add a polariser, and you can rotate it to control those reflections — reducing glare, revealing what’s underneath, and bringing back colour and detail in submerged rocks and textures.
Below are two examples taken moments apart — one with a polariser, one without. Both were processed in exactly the same way.
The difference between them says far more than I can.
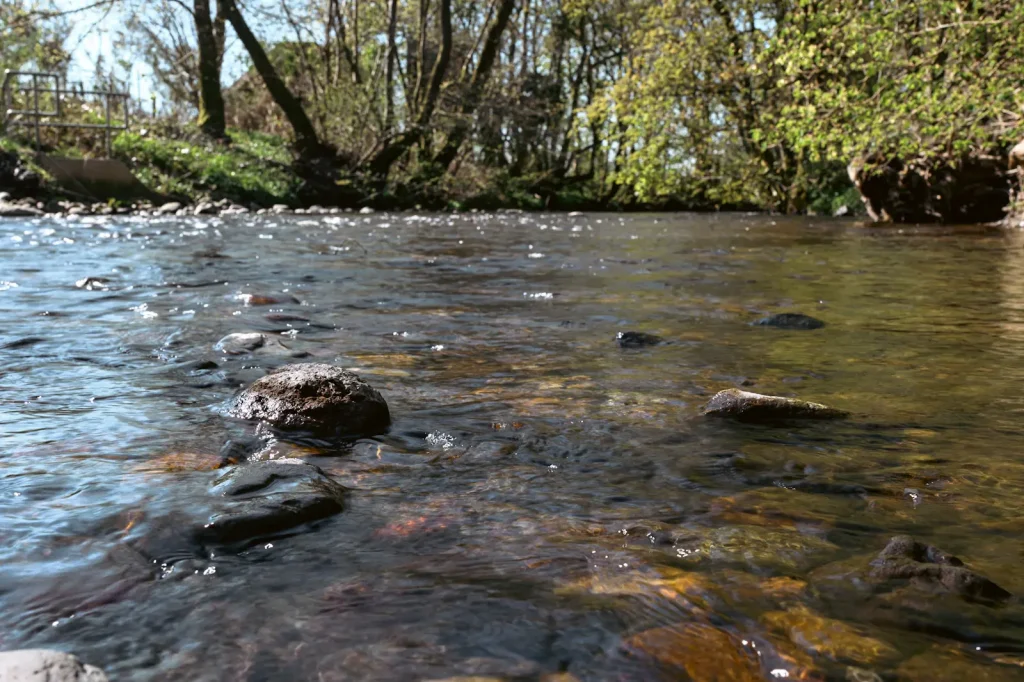
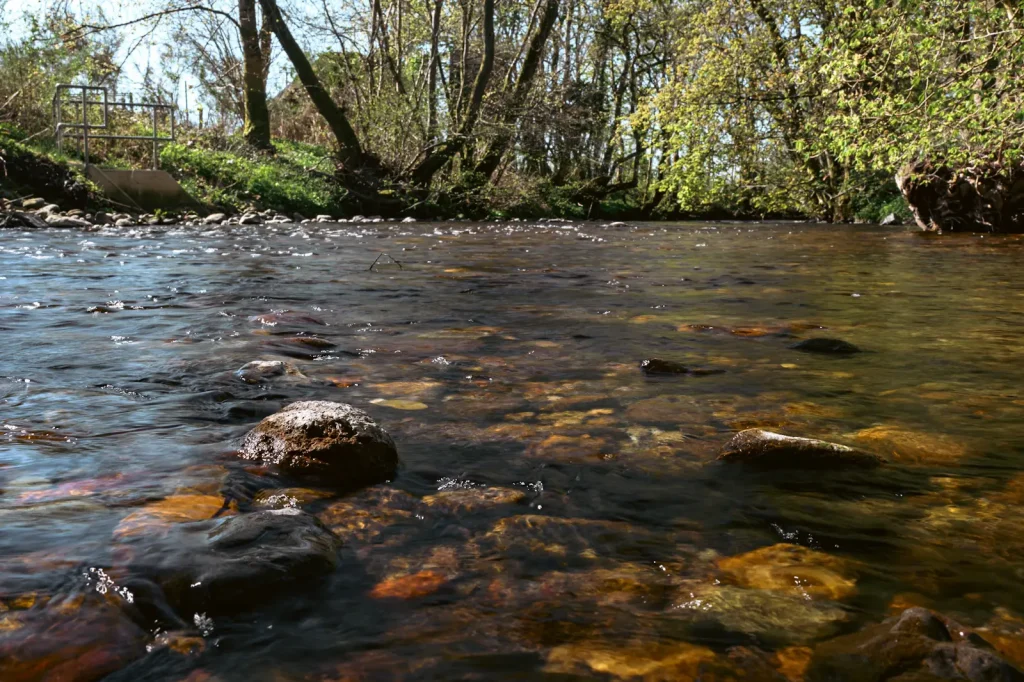
And that’s the key point: you can’t recover that information later. If it’s hidden by reflections at the time of shooting, it’s gone.
This isn’t just about water.
A polariser cuts reflections anywhere — windows, shiny surfaces, wet objects — and that makes it useful in far more situations than most people realise.
I use it a lot when photographing plants and flowers after heavy rainfall. That’s when they look their best, but it’s also when reflections can wash out colour and detail. A polariser lets you control that, bringing back richer tones and reducing glare on the surface.
Extra Benefit: Slower Shutter Speeds
Polarising filters typically reduce light by around a stop compared to shooting without one. That might not sound like much, but it can be useful when you want to slow your shutter speed slightly — for example, softening moving water without needing a full ND filter.
In some situations, that small reduction is enough to get the look you want without adding extra filters.
A Small Drawback to Be Aware Of
One thing to watch out for is using a polariser with ultra-wide lenses, like the Nikon Z 14–30mm f/4 S.
Because of the wide field of view, the polarising effect isn’t even across the frame. You can end up with one part of the sky looking much darker than the rest, which can feel unnatural if you’re not careful.
It’s not a deal-breaker — just something to be aware of when composing your shot.
Choosing the Right Polariser
This is one area where quality matters.
I’ve used cheap filters in the past, and they tend to introduce colour casts, uneven results, and — most frustratingly — they’re incredibly difficult to clean properly once they get dirty.
For years, I’ve used Hoya HD filters, after much trial and error with other brands and even different models from Hoya. They strike a good balance between quality and price — no colour issues, easy to clean, and solid build quality thanks to hardened glass. I specifically avoided their Pro1 range, as I found them harder to keep clean in real-world use.
They’re also slim enough to avoid vignetting, where the filter frame starts to creep into the edges of the image.
My Setup (Keep It Simple)
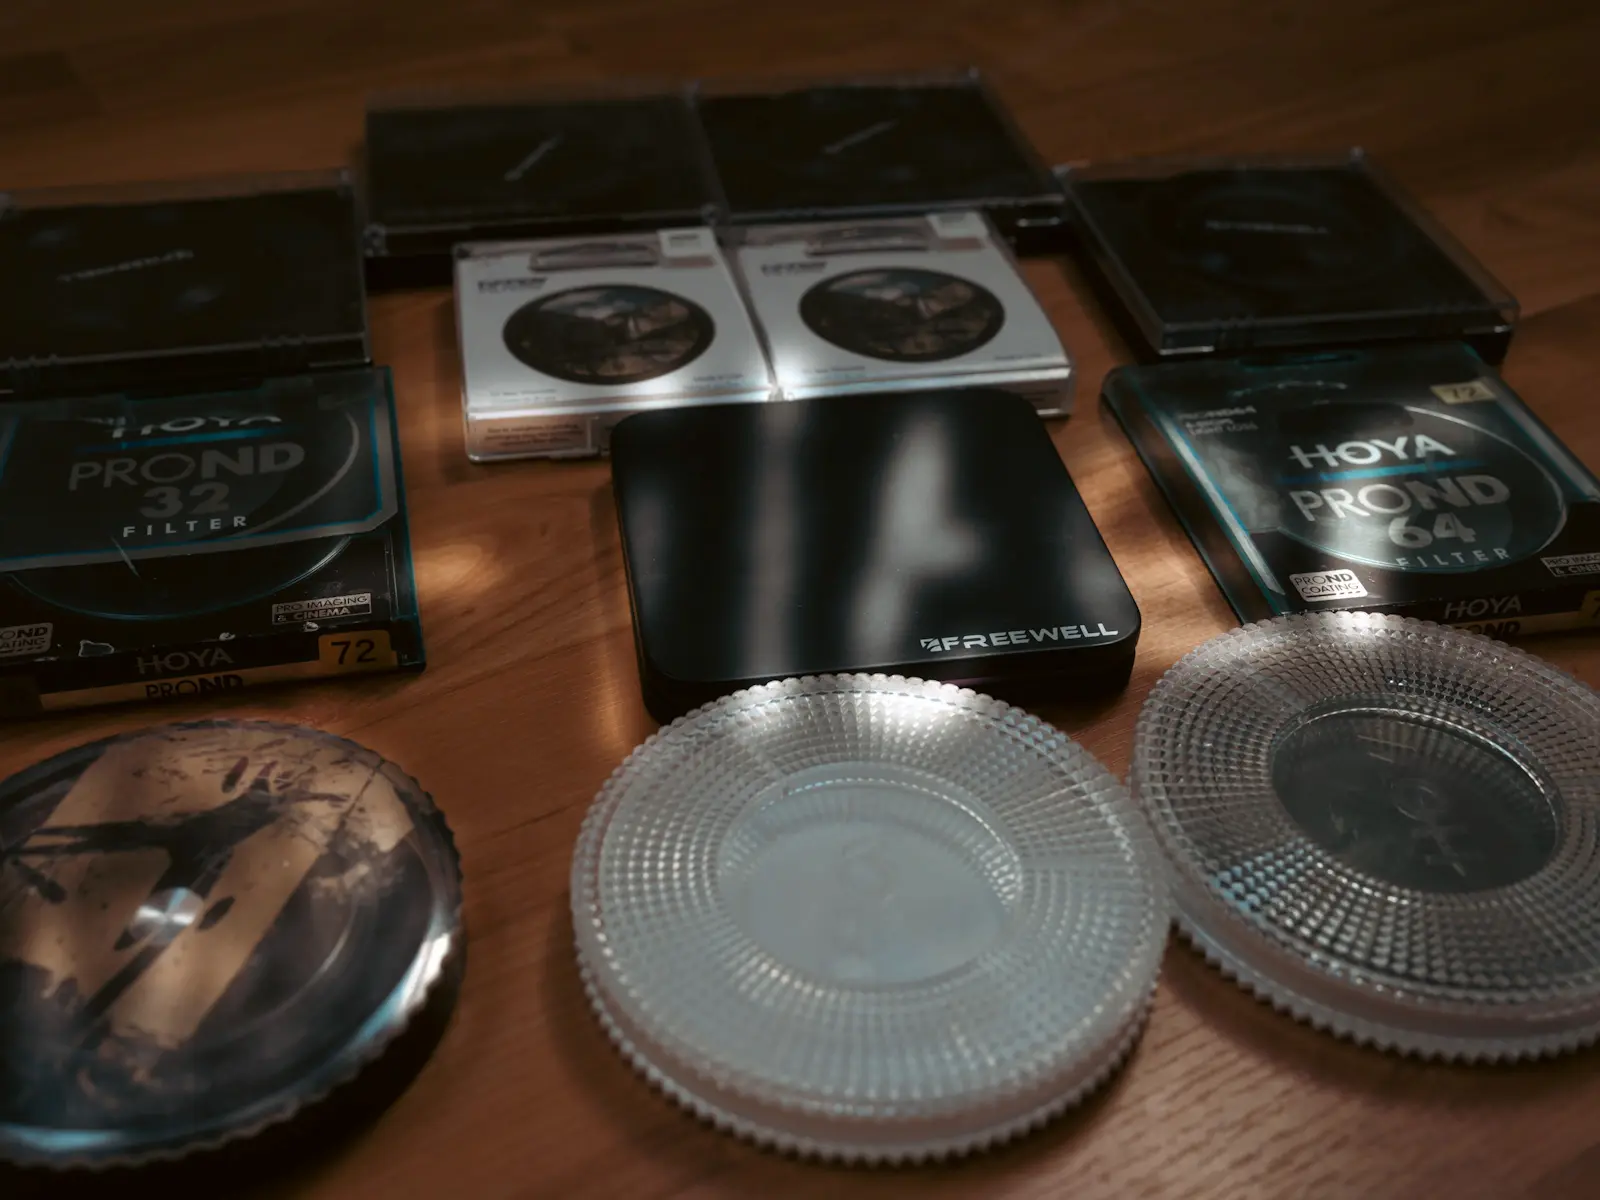
I used to carry multiple filters in different sizes. Now, I keep it simple:
- 82mm for my wide-angle setup
- 77mm for everything else
If I need to use them on smaller lenses, I just use a set of step-down rings. It’s a cheap, simple solution and avoids buying the same filter multiple times.
🔹 What I Use
This is the latest version of the one that I use — the Hoya HD3 Circular Polarising Filter. It’s easy to clean, doesn’t introduce colour casts, and just works without fuss.
Check Latest PricingND Filters — Useful, But Not Essential

So what about ND filters?
I’ll be straight — for video, they’re essential. For photography, it depends on how you shoot.
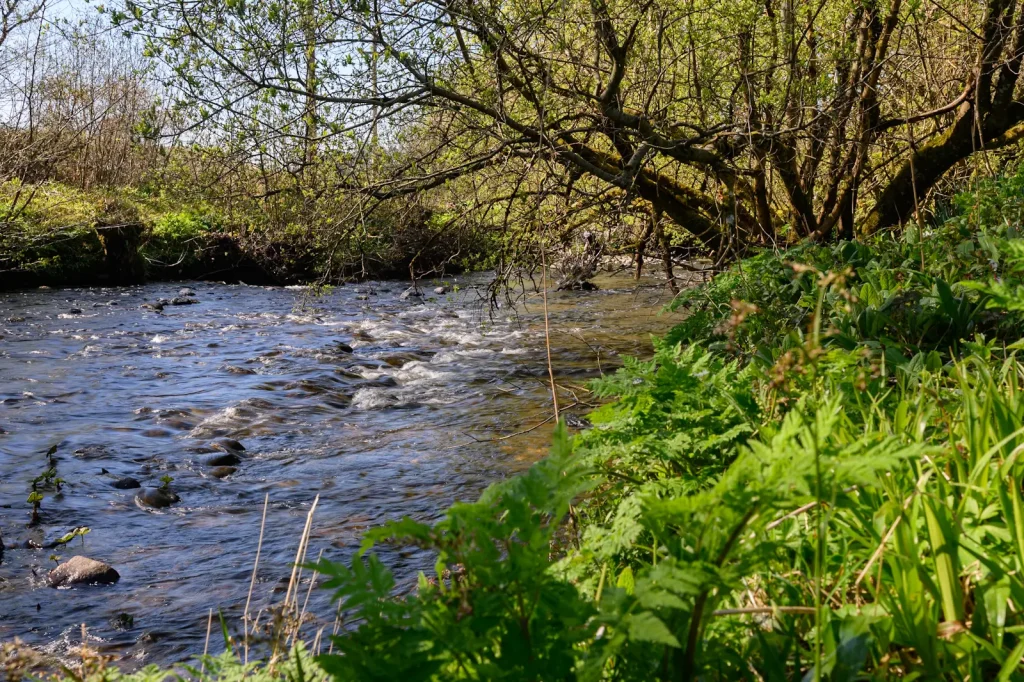
If you enjoy long exposures — waterfalls, rivers, the sea — then ND filters make life easier. They let you achieve that smooth, silky look regardless of how bright it is. For that reason alone, I’d say they’re worth having if those kinds of subjects appeal to you.
But I don’t consider them essential.
In my experience, these scenes often look best on overcast days anyway. Light levels are lower, reflections are reduced, and conditions are naturally better suited to longer exposures. In those situations, simply stopping your lens down to something like f/11–f/16 (or further if needed) is often enough to get a slower shutter speed and introduce motion into the water — no ND filter required.
Would the result be cleaner with an ND filter? Probably.
But it’s entirely possible to achieve the look without one.
Modern stabilisation has also changed things. With effective IBIS in today’s cameras, handheld shots at 1/4 to 1 second are realistic, which means you don’t always need a tripod either.
When ND Filters Become Necessary
Where ND filters do become essential is at the extreme end.
If you regularly shoot long exposures — several seconds or even minutes — then you’ll need something like the Lee Big Stopper or an equivalent 6–10 stop filter.
That kind of effect simply isn’t possible without one.
My Experience Using ND Filters
ND filters come in a variety of styles from fixed filtration rectangular filters that need adapters to circular screw on variable strength designs.
I do own a Big Stopper, but I rarely use it.
Partly because of the extra setup — filter holders, adapters, and the whole system — but also because I’ve often found stronger ND filters introduce colour casts that aren’t always easy to correct in post.
These days, if I use ND filters, I tend to stick with lighter-strength, variable ND filters and adjust my shutter speed and aperture to get the result I want. You have to choose your variable ND filter wisely as some designs introduce an un-sightly X shaped pattern in to your images as you increase the strength of the filtration. I now use Freewell variable ND filters which don’t have this issue and are reasonably priced.
It’s a simpler way of working — and for me, it fits better with how I shoot now. However with cameras such as the OM System OM-3, they now have built in computational modes that replicate the effect of an ND filter and even graduated ND filters.
🔹 What I Use
This is the variable ND filter I use — the Freewell Variable ND. It’s well built, easy to use, and gives me flexibility to adjust exposure without constantly swapping filters.
Check Latest PricingBlack Mist Filters — Fun, Not Essential

More recently, I’ve been experimenting with black mist filters on my Fujifilm X100VI.
These have become incredibly popular with photographers chasing a less clinical, more “film-like” look. What they do is fairly simple — they diffuse light slightly, lower contrast, and add a subtle glow (or halation) around bright light sources.
It’s a very distinctive look, and right now, it’s everywhere.
And to be fair — it can be fun.
On a camera like the X100VI with its small 49mm filter size, they’re relatively inexpensive, so it’s easy to pick one up and experiment. I’ve used both 1/4 and 1/8 strength filters, depending on how subtle I want the effect to be.
But I’m going to be straight here.
If you’re new to photography and wondering whether a black mist filter is going to take your images from good to great — it won’t.
This is a creative tool for achieving a specific look, not something that improves your photography in a fundamental way.
The effect itself is also quite subtle. You’ll notice it most in scenes with strong light sources — street lights, headlights, or backlit subjects — and occasionally in how it softens skin tones. In many situations, you may barely notice it at all.
Would I recommend buying one?
Generally, no.
But if you shoot a lot at night, particularly in cities, or you’re drawn to that retro, cinematic look, then at the price, it can be worth trying.
Just don’t feel like you need one.
I’ve seen trends come and go over the years, and while black mist filters are very popular right now, I’d expect that to shift over time.
🔹 What I Use
This is the black mist filter I use — the Tiffen Black Pro-Mist. It adds a subtle glow to highlights and softens contrast slightly for a more film-like look without overdoing it.
Check Latest PricingDo You Need UV or Protection Filters?
I used to buy UV or protection filters for every lens I owned.
These days, I don’t.
I came to the conclusion that putting a £100–£200 piece of glass in front of lenses worth thousands probably isn’t doing image quality any favours. Instead, I leave the lens hood attached and take care of my gear.
That’s been more than enough.
As for UV filters specifically, they’re really a holdover from the film days. Back then, they served a purpose — cutting ultraviolet light hitting the film stock.
With digital cameras, that simply isn’t needed.
The only time I would actively advise putting protection filters on your lenses is in particularly harsh environments — for example, if you’re shooting seascapes and want to protect your lens from salt spray. A good protection filter is also easier to clean than a front element, and far less worrying to scratch.
🔹 What I Use
If I do use protection filters, these are the latest version of what I use — the Hoya HD3 Protection Filters. The glass is extremely tough yet easy to clean, which makes them far more practical in real-world use.
Check Latest PricingConclusion
If I was starting again today, I’d buy one filter — a circular polariser — and spend the rest of my time learning how light behaves.
If I was regularly shooting seascapes or long exposures, I’d add a variable ND filter for that extra control over shutter speed. Beyond that, I wouldn’t feel like I was missing anything.
That’s really the takeaway.
You don’t need a bag full of filters to take great photos — just a couple of high-quality options for specific situations. Beyond that, learning to see and work with light will do the rest.
FAQ
What photography filters do I actually need?
For most photographers, the only truly essential filter is a circular polarising filter. It creates effects you can’t properly replicate in post-processing, particularly when cutting reflections and improving colour in landscapes.
Are graduated ND filters still worth buying?
Not for most photographers. Modern cameras have much better dynamic range, and bracketing is now fast and easy to use. In many situations, blending exposures in post-processing replaces the need for graduated ND filters.
What does a circular polarising filter actually do?
A circular polariser reduces reflections from water, glass, wet surfaces and foliage. It also improves colour saturation and contrast, especially in landscape photography.
Do ND filters improve image quality?
No. ND filters reduce the amount of light entering the lens so you can use slower shutter speeds or wider apertures in bright conditions. They are creative tools rather than image quality tools.
Do I need an ND filter for waterfalls and rivers?
Not always. On overcast days, stopping your lens down to f/11 or f/16 is often enough to create some motion blur in water. For very long exposures in brighter conditions, an ND filter becomes much more useful.
Are variable ND filters any good?
They can be useful if you choose a good one. Cheap variable ND filters can create uneven dark patterns or colour shifts. A quality variable ND filter is more convenient than constantly swapping fixed-strength filters.
Should beginners buy black mist filters?
Probably not. Black mist filters are creative tools rather than essential accessories. They soften contrast slightly and add glow around highlights, but they won’t fundamentally improve your photography.
Do UV filters protect lenses?
They can, but I personally no longer use them on most lenses. A lens hood and careful handling are usually enough. The exception is harsh environments like seascapes, where salt spray can justify using a protection filter.
Can filters reduce image quality?
Yes. Poor-quality filters can introduce flare, colour casts, softness and cleaning issues. If you use filters regularly, it is worth buying good-quality ones.
What filter sizes should I buy?
A simple approach is to buy filters sized for your largest lenses and then use step-down rings for smaller lenses. This avoids buying multiple versions of the same filter.