
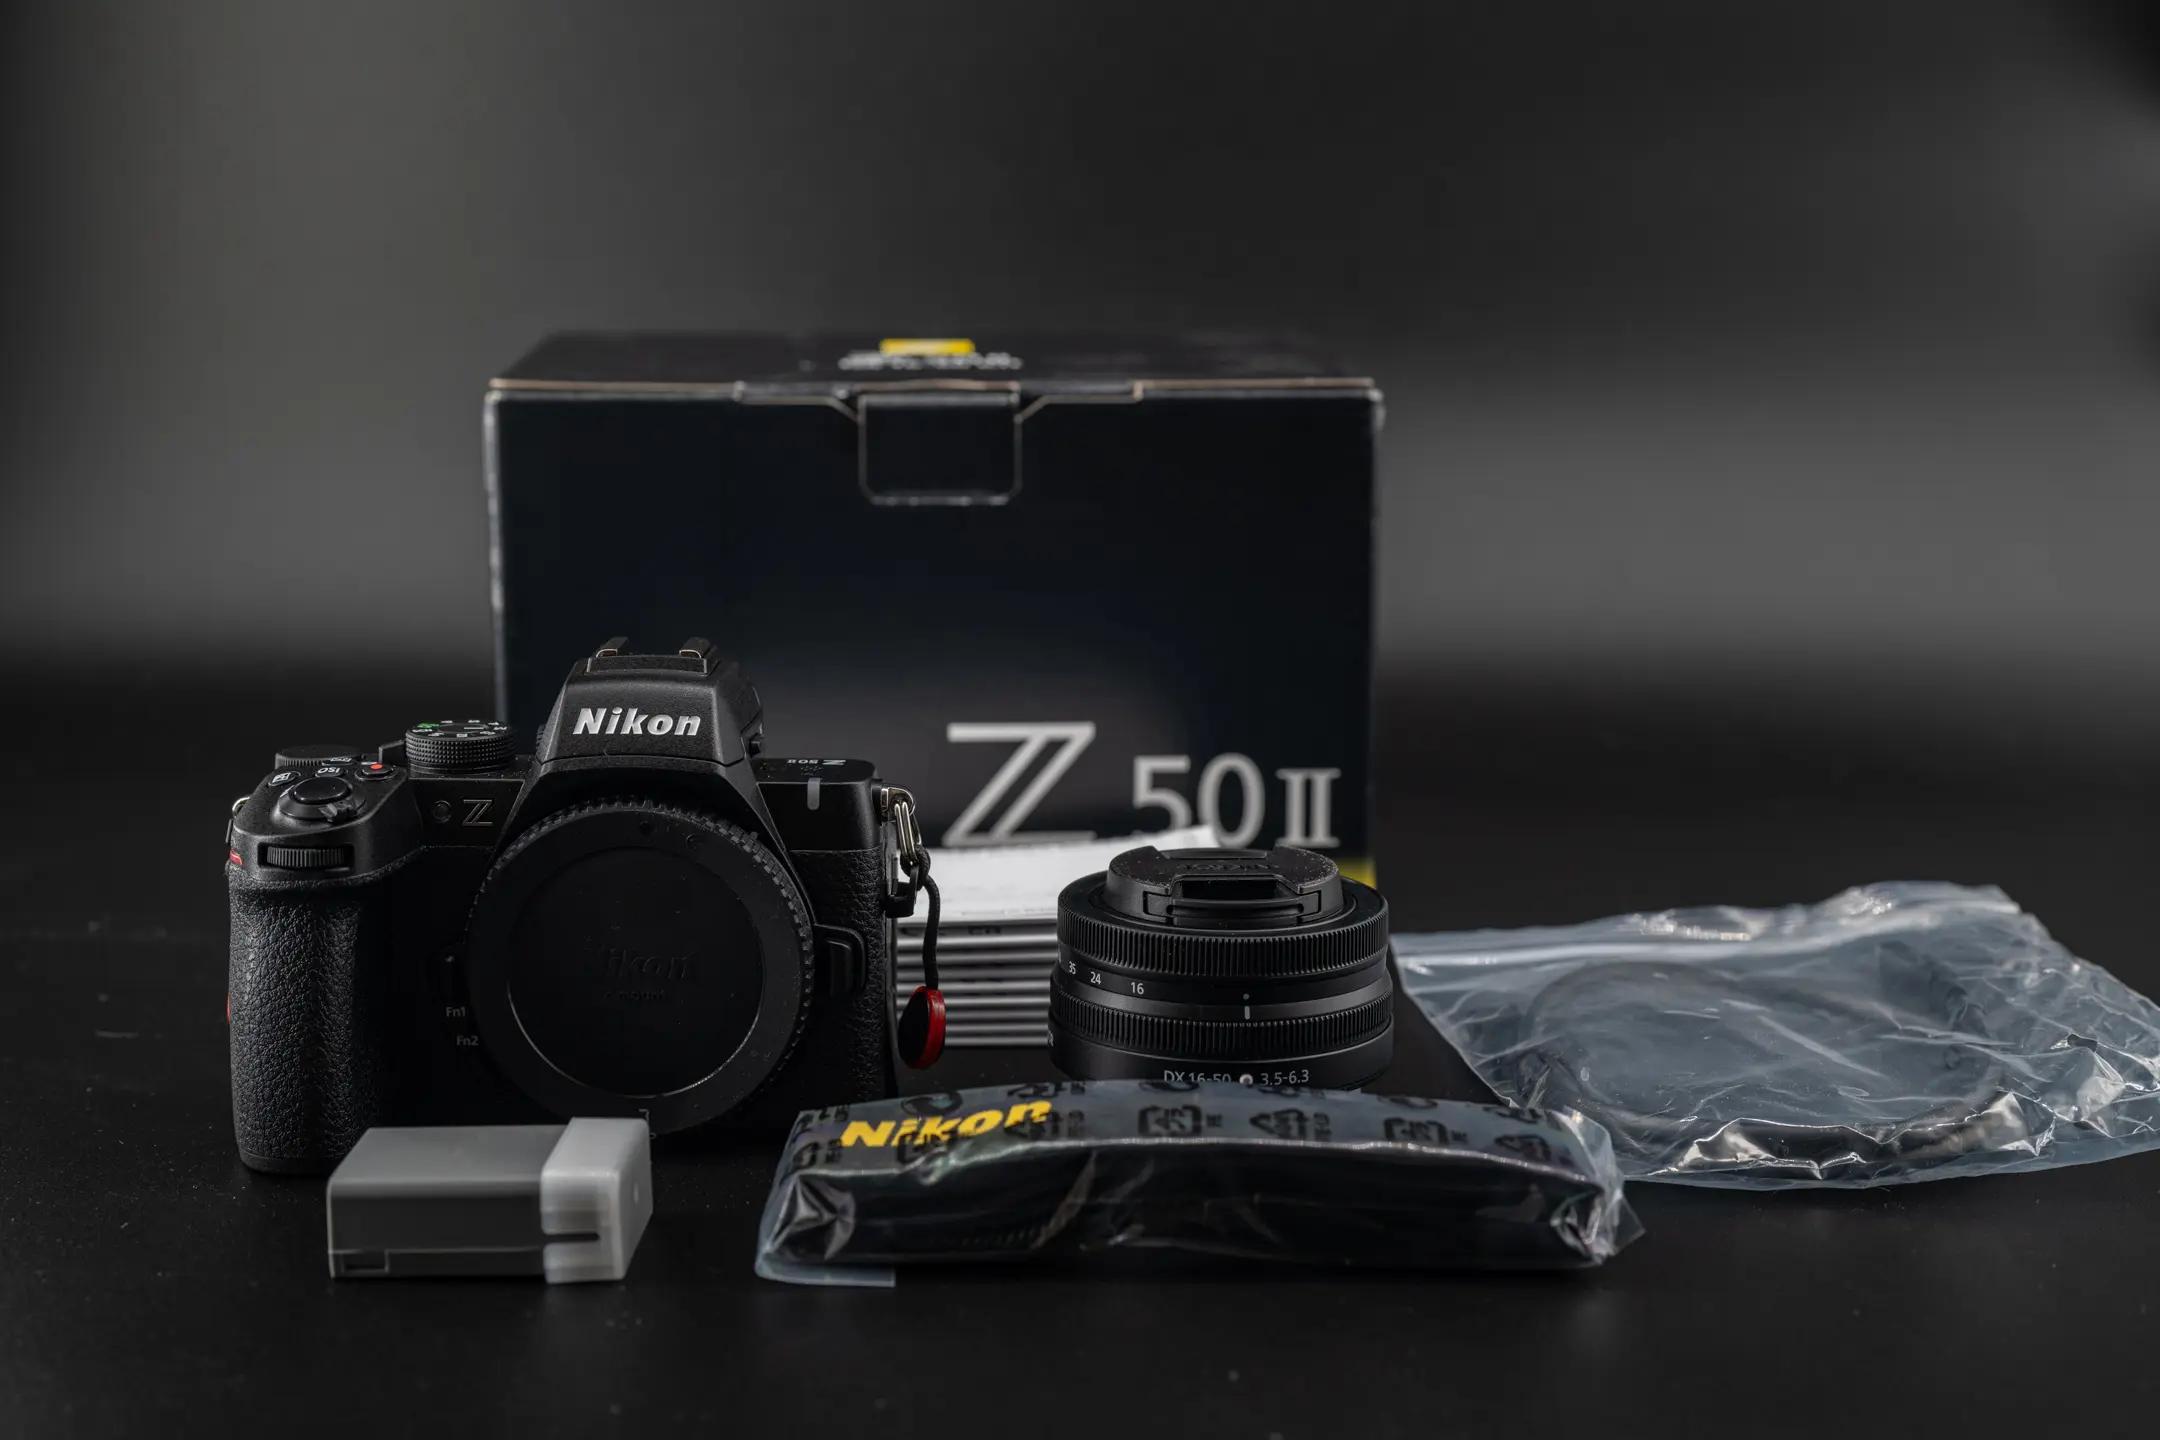
In this setup guide, I’ll walk you through the essential configuration steps for your Nikon Z50II to ensure you get the best results from day one. I’ll keep things simple, focusing only on the critical settings you need to start taking great photos immediately. In a future article, I’ll dive into advanced configurations and the personal customizations I use to transform this camera from a beginner-friendly tool into a powerful, professional-grade system that is set up to be as similar to my Z8 and Z6III as possible. You can see some of my recent outings with the Nikon Z50II here.
My goal here is to remove technical friction so you can focus on what matters: taking pictures. Whether you’ve just unboxed your camera or are simply eager to start shooting without getting lost in complex menus, this guide is designed to get you up and running as quickly as possible.
Getting Started: Your First Steps
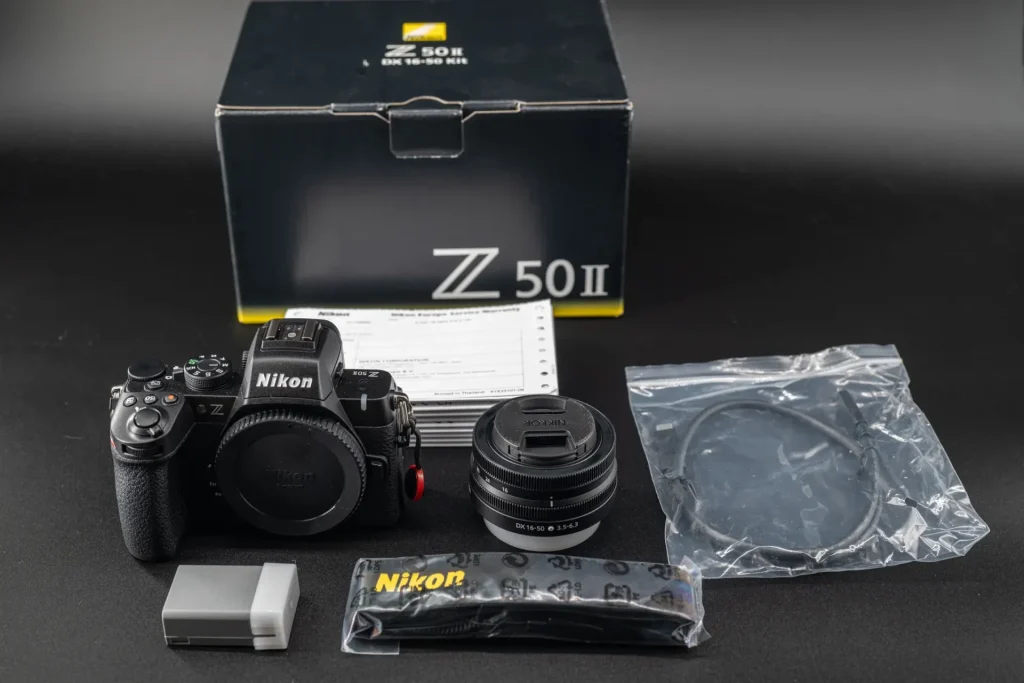
The first thing you are going to want to do when you get your new Nikon Z50II is to check that you have everything that is supposed to be included. Sometimes this varies by region. My Z50II was bought in a kit with the Nikon Z 16-50mm kit lens and is official UK stock bought from Amazon. Here is what’s included:
- Nikon Z50II camera body with lens cap.
- Nikon EN-EL 25a rechargeable battery with plastic battery cap.
- NIKKOR Z DX 16-50mm f/3.5-6.3 VR lens and white plastic rear lens cap.
- Official Nikon Camera Strap
- USB-C Charging Cable
- Official Nikon warranty paperwork
The Nikon Z50II does not come with a separate charger so unlike older models, you will have to charge it via the USB-C cable before your first use.
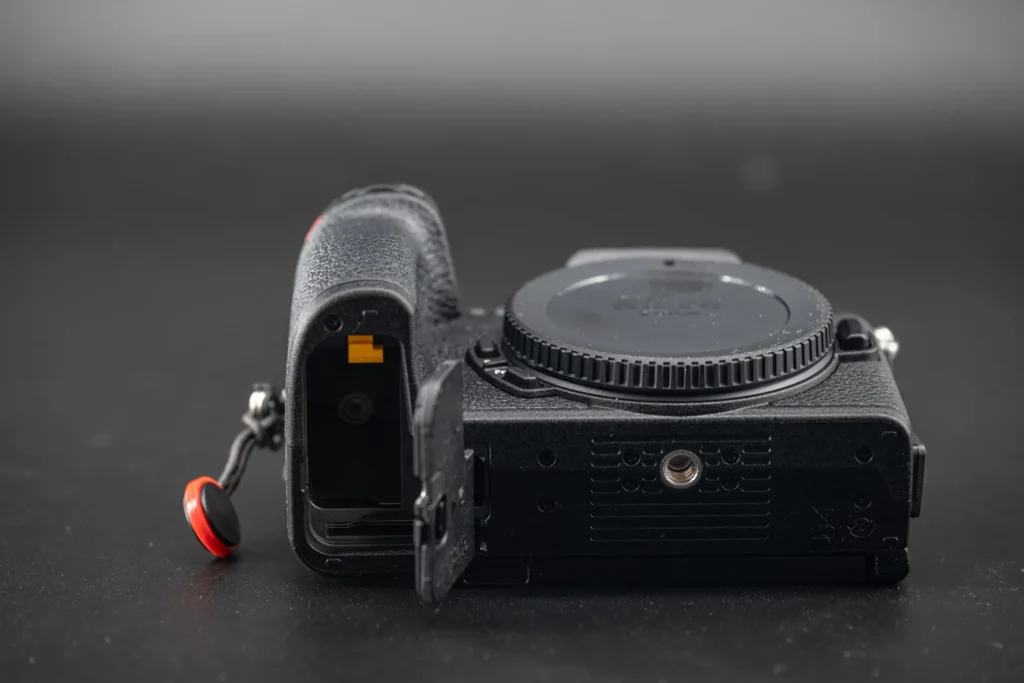
Both the battery and SD card fit into the same compartment at the bottom of the camera, underneath the camera grip.
Ensure that you put the SD card in with the sticker side facing towards the outside of the camera as is shown below. Don’t force the card as it should fit in perfectly and you will feel a gentle click as it correctly fits in to place.
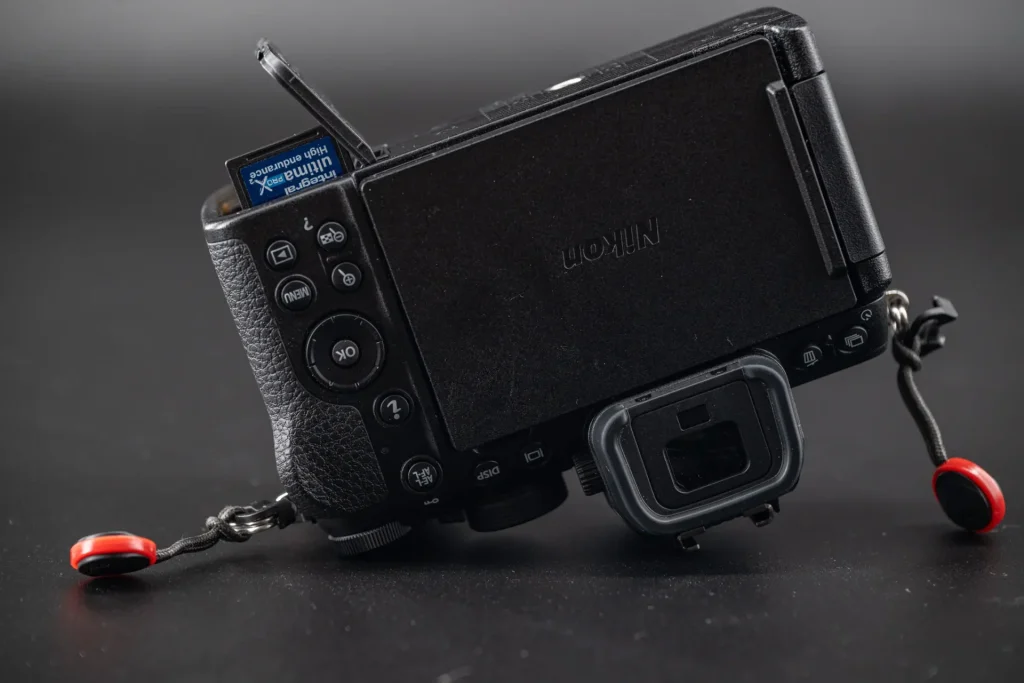
Once you have slotted in your memory card, check the orientation of the battery by aligning the metal pins with those inside the camera.
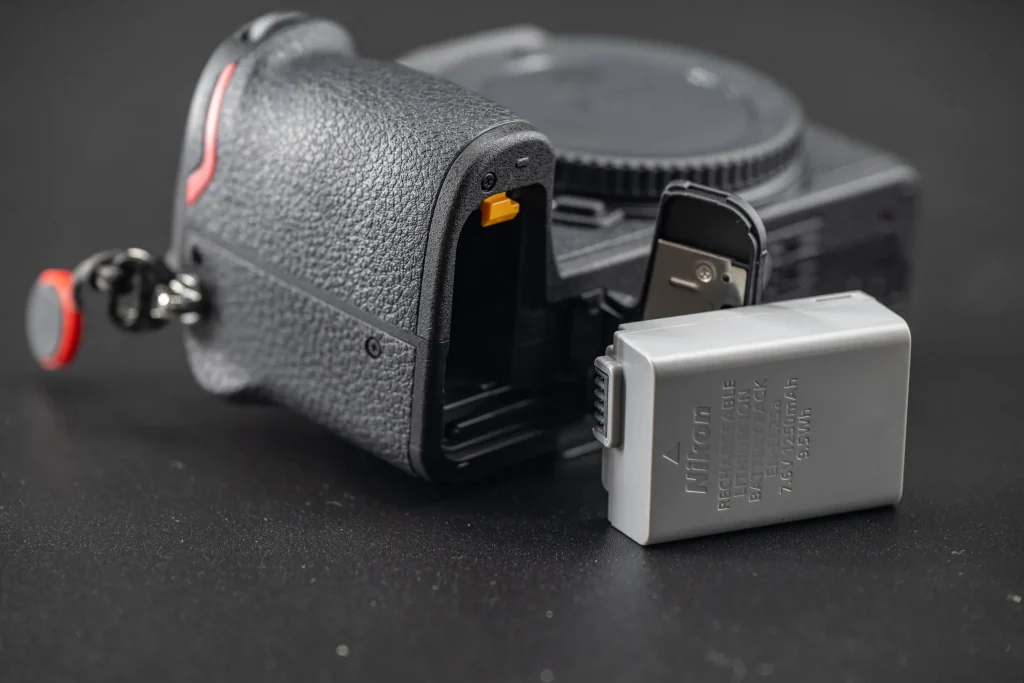
Slot into place and you will feel the battery catch within the latch. Then close the battery compartment door and you will again feel a click as the door locks in to place.
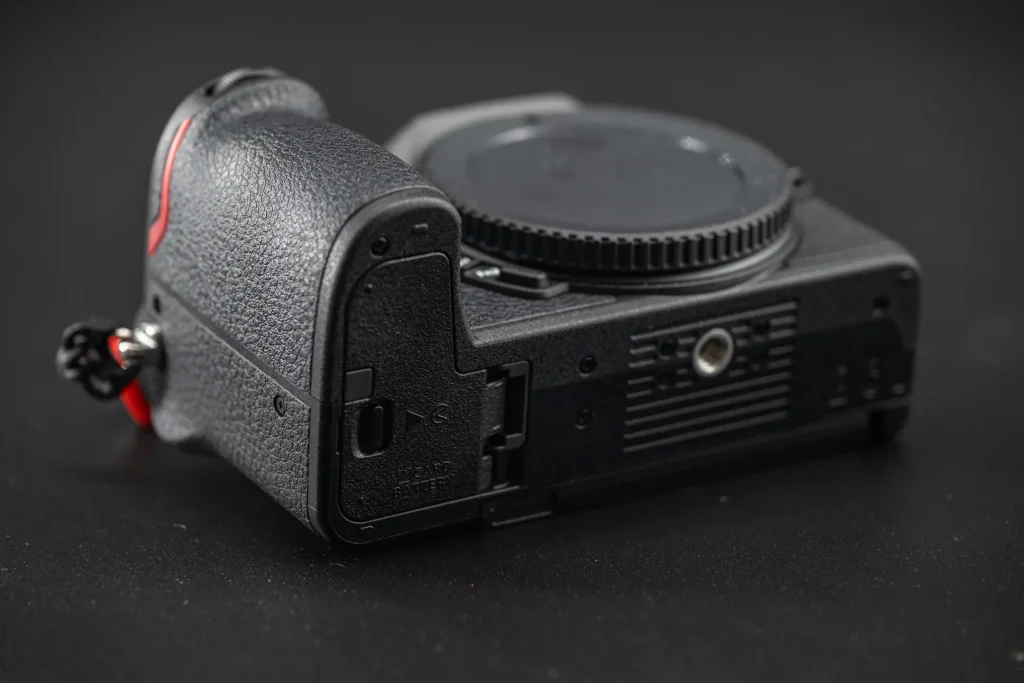
Now it’s the bit all photographers hate, charging up the camera and being patient. Make sure you fully charge the camera before first use as that maximises the power and battery condition, ensuring it performs as well as possible.
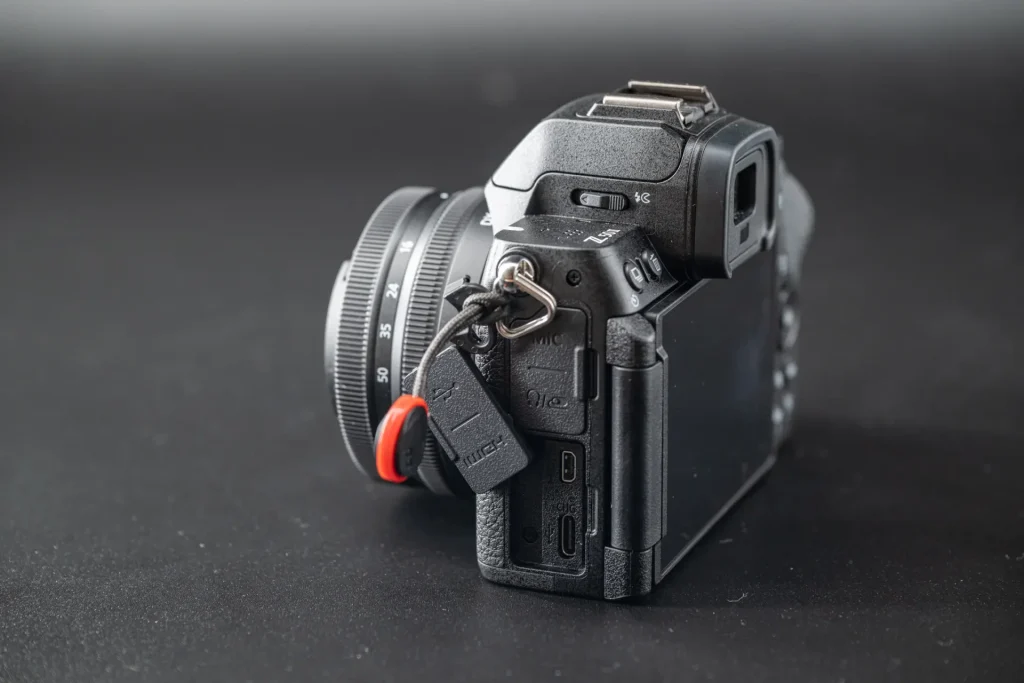
Simply plug the supplied USB-C cable in to a USB-C compatible charger and the other end in to your camera. On the left hand side of the camera you will see a small orange light indicating that the camera is charging. When the light goes off, the camera is fully charged.
Once the camera is fully charged you will need to attach your lens to it in order to access all shooting menu options.
If you haven’t done this before then it’s a simple process. Loosen the rear (white if you have the kit lens) lens cap so that you can take it off one handed. leave the lens face down in a safe accessible place.
The best way to put a lens on your camera in order to minimise getting dust on the sensor is to have the camera held in your right hand, front of the camera facing towards the floor.
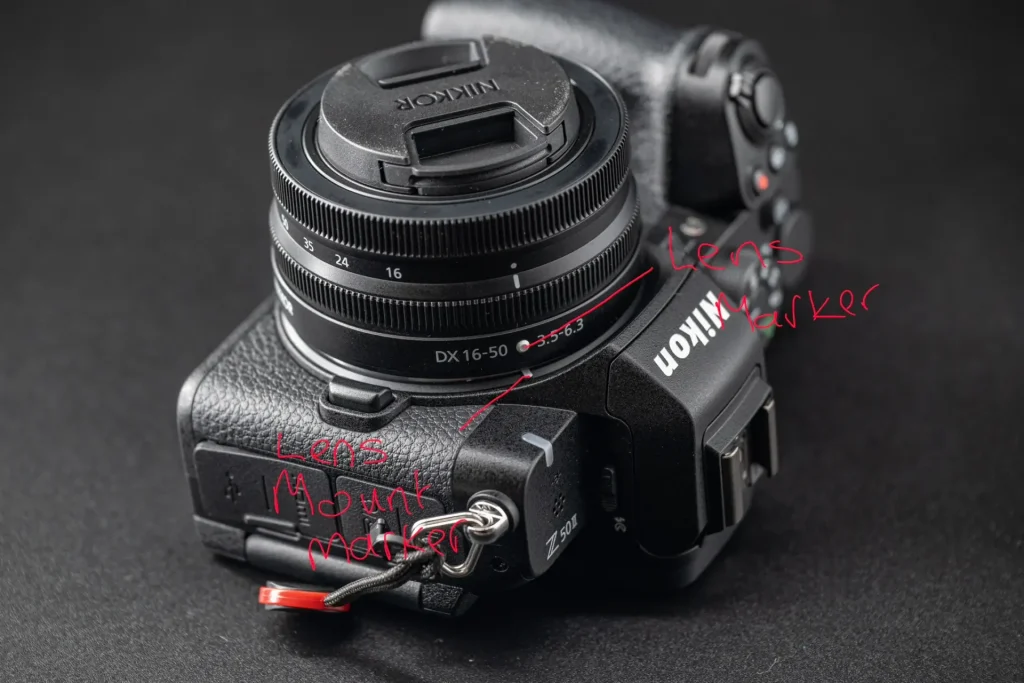
Now press the lens release button on the camera (I find using my left thumb for this easiest). It’s located to the left of the lens mount as you hold the camera (you can see it in the picture above, just above where I’ve marked up the photo saying ‘lens mount marker’) . As you press the lens release button, turn the plastic lens cap on the camera to the left (counter clockwise as you hold the camera) until the white dot on the lens lines up with the white dot on the lens mount of the camera. The lens cap will then come off if you gently pull it away from the camera body.
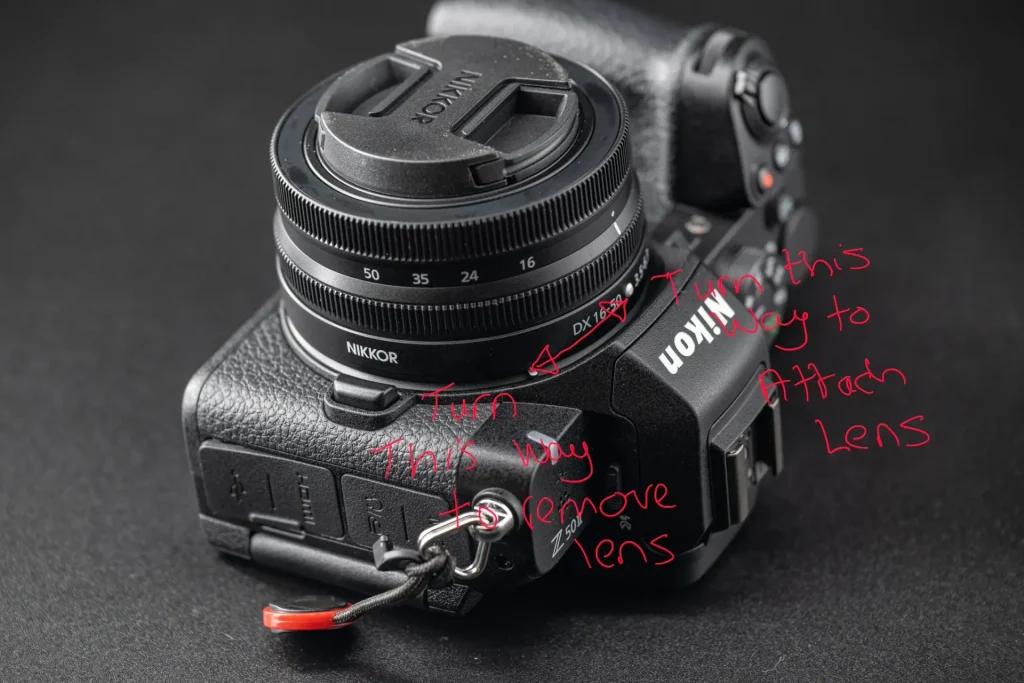
Now remove the rear lens cap from the lens, and line up the white dot on the rear of the lens with the white dot on the camera’s lens mount. You will know when you have them lined up correctly as the lens will sit flush to the camera lens mount. Once lined up, simply turn the lens to the right (clockwise as you hold the camera) until it clicks in to place. Your’e now ready to power up your camera for the first time. One tip, always switch the camera off before changing lenses to avoid dust being attracted to the sensor by the electrical charge of the camera.
Understanding your Shooting Modes (The PASM Dial) Before turning the camera on, set the shooting mode by turning the top-right PASM dial. Here is a quick breakdown of what they do:
- M (Manual): You have full control over Aperture, Shutter Speed, and ISO (if not using Auto ISO).
- A (Aperture Priority): You control the Aperture and ISO (if not using Auto ISO), and the camera adjusts the shutter speed to get the correct exposure.
- S (Shutter Priority): You control the Shutter Speed and ISO (if not using Auto ISO), and the camera controls the Aperture.
- P (Program): The camera controls Aperture and Shutter Speed, while you control ISO (if not using Auto ISO).
- SCN (Scene Mode): The camera controls all settings based on a specific scene you select (e.g., food, portraits, landscapes).
- Auto Mode: The camera controls almost everything. Note that many advanced functions—like manual White Balance or custom AF modes—are locked here.
- C1–C3: These are custom slots for your saved settings. Ignore these for now; I’ll cover how to set these up in my advanced guide.
My Recommendations: If you are just starting out, P mode is a great place to begin. The camera handles the heavy lifting of exposure, but it finally lets you make adjustments and access the menus restricted in Auto mode.
If you want to get creative but don’t want to be overwhelmed, Aperture Priority (A) is where you should head next. Controlling the aperture allows you to creatively manage your depth of field (how much of your frame is in focus) while leaving the camera to handle the shutter speed. It’s a very fast way to get the professional-looking results you want while being able to shoot quickly.
Turning the camera on for the first time
Nikon has the best on/off method in the industry. Simply flick the switch located around the shutter button to the on position. It’s the best as it allows you to quickly turn the camera off and on one-handed.
To navigate through Nikon’s menu system use the multi-selector 4-way controller located around the OK button. Of course you can always use the touch-screen if you prefer.
Here’s a quick breakdown of the controls:
Multi selector buttons:
- Enter – Right on the multi selector or press the OK button
- Back – Left
- Return to main menu – Press the Menu button
- Resume shooting – Half press the shutter button
The first thing you will need to do is set the time and date for your camera. This is located in in the setup menu denoted by the spanner icon on the left hand side of the menu page).
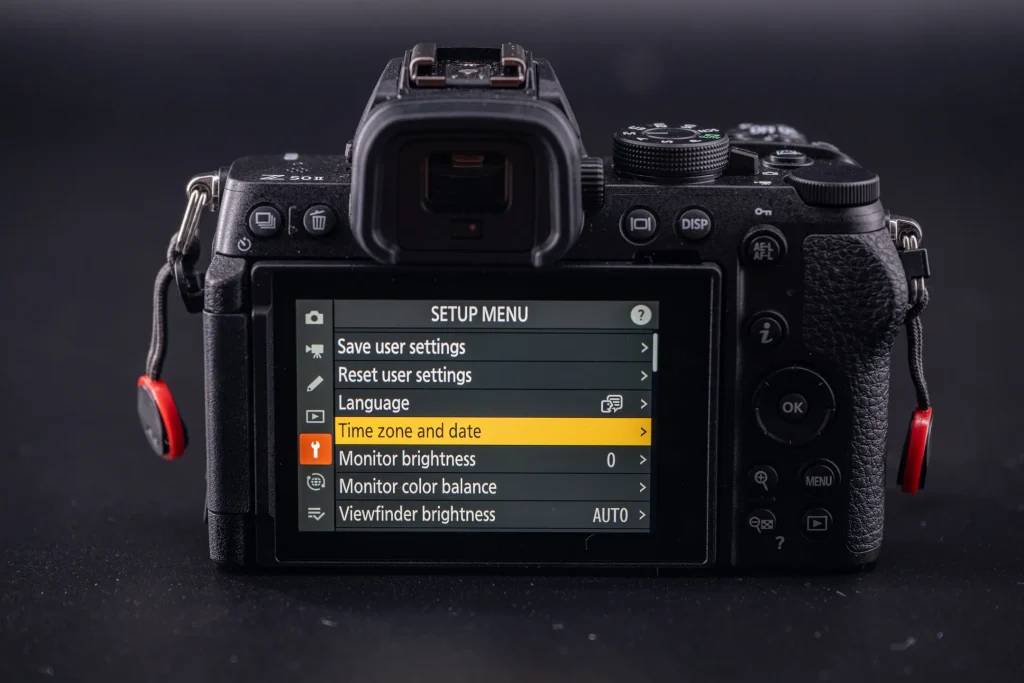
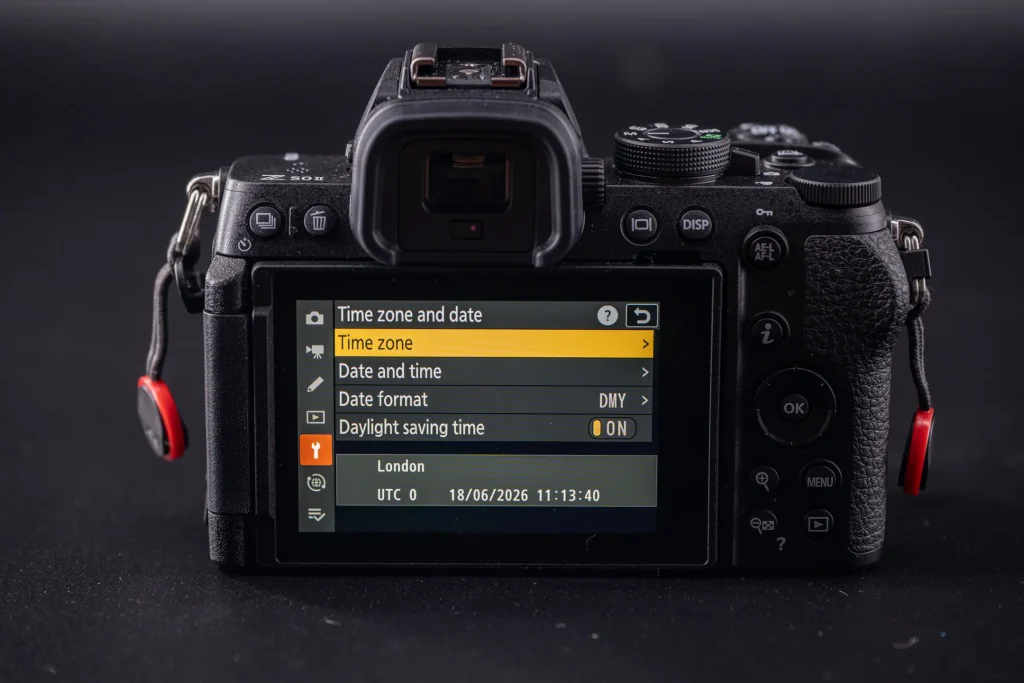
I’m in the UK so I set it to:
- Timezone: London
- Date format: DMY
Next, we will set up the basic camera options in the Photo Shooting Menu (denoted by the Camera Icon on the left hand side of the menu page.
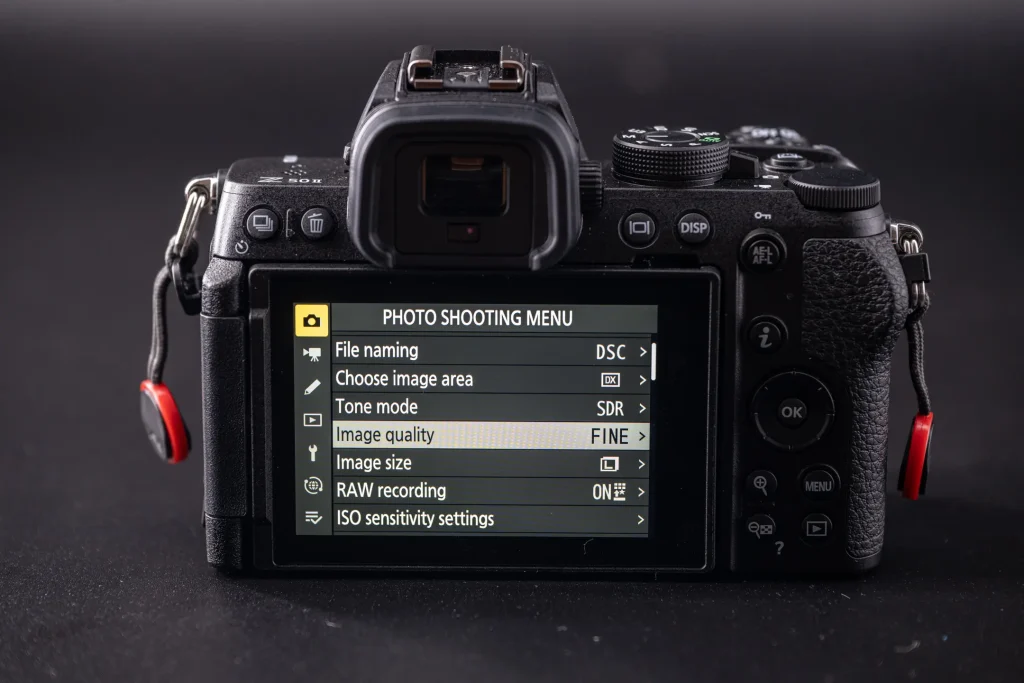
I’m not going to recommend changing too many settings here initially as the aim is to get you shooting as quickly as possible. If I haven’t mentioned it below, then I don’t think it’s worth changing at this stage.
If you’re a beginner and don’t want to spend too much time editing photos after you have taken them then the settings below will get you great results.
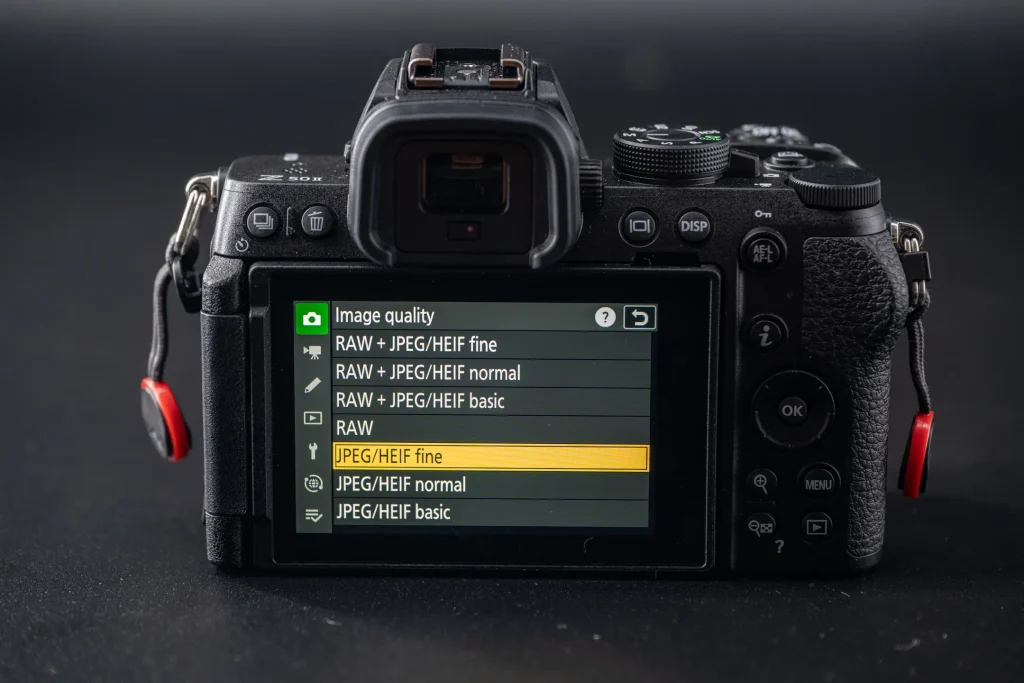
Select Image quality > Jpeg/Heif> Fine: The best image quality straight out of the camera. By shooting in Jpeg, the images the camera produces won’t need heavy editing. They are a final product, ready to use. They will have had color and sharpening applied to them and are ready to share or print. You can still edit them in an app further if you wish with small adjustments to exposure, adding filters for film looks etc. Note: The Z50II has a dedicated picture control button on the top right of the camera where you can manually select your preferred Picture control profile. Why Nikon calls them that rather than just color profiles I don’t know. Anyway, although it’s totally subjective, I tend to use Standard for color shots and Deep Tone Monochrome for black and white images.
Why not shoot in RAW? Every “expert” will tell you to shoot in RAW format for the best possible quality. While that is technically true, when you are just starting out, the last thing you want to be doing is spending hours editing every single photo in software. Unedited RAW files look inherently flat and lifeless. Often, you will struggle to make a RAW file look better than a “straight out of camera” JPEG, so why not save yourself the time? Despite what you’ll often hear, you can still edit JPEG files if you want to apply a creative look, and they are perfectly usable even if you never touch a piece of editing software.
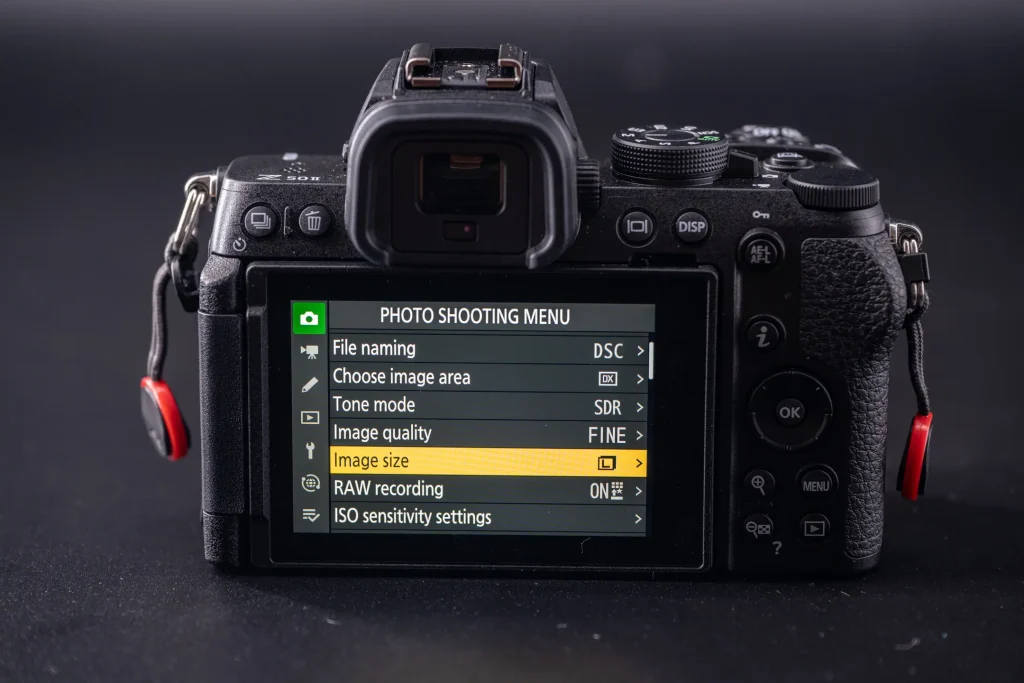
Select Image Size > Large: This gives you the maximum resolution from the Nikon Z50II. 5568 × 3712 pixels or 20.9mp.
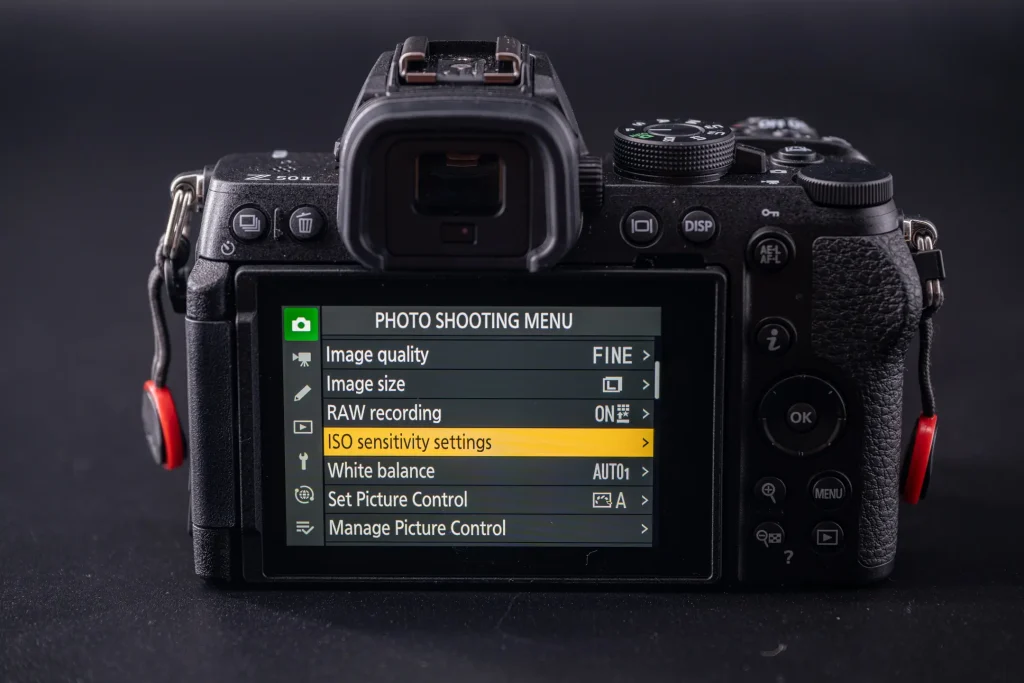
Next we are going to set up the ISO settings of the camera so that it will change this for you automatically. Think of ISO as the ability of the camera to brighten or darken the image based on your other exposure settings. It’s a little more technical than that but for now, just understanding this will be enough to get started.
We want the camera to choose the ISO setting so you don’t have to keep changing it whenever the light changes but we want to give the camera certain parameters to work within so that you always get sharp photos.
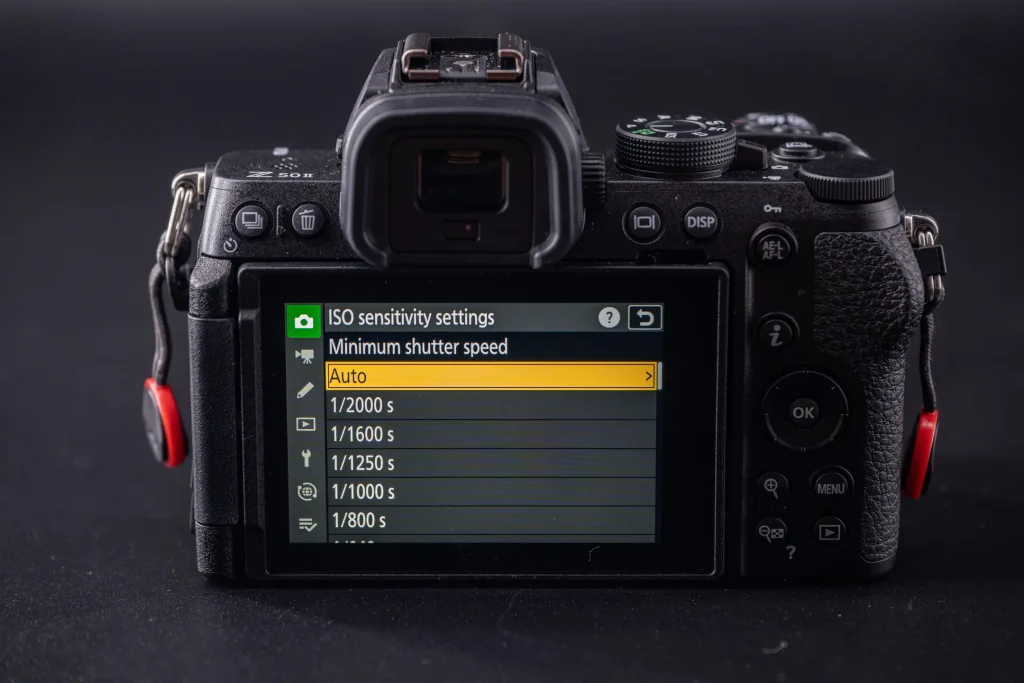
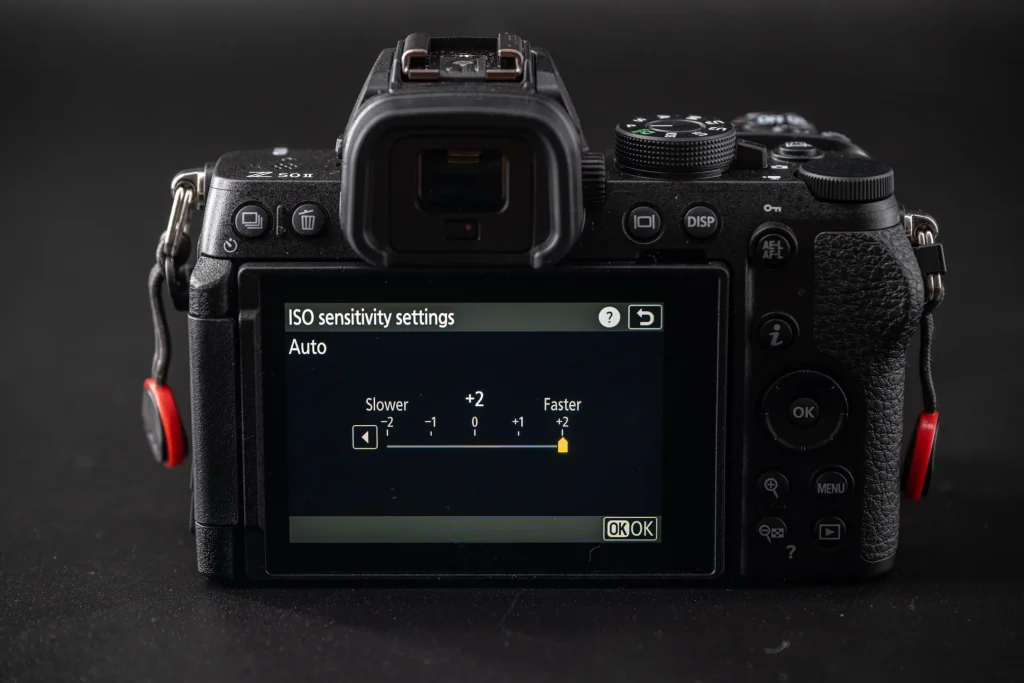
Select ISO sensitivity settings > Auto ISO Sensitivity control ON and then under Minimum shutter speed select Auto and click again. Now select Faster +2 setting. This ensures that the camera will give you a fast enough shutter speed to get sharp shots based on your focal length. I set Maximum sensititvity to 12800 as thats about the limit of what I consider to be acceptable image quality from the Nikon Z50II.
Next we’re going to make sure you have white balance set to auto so that the color of your photos will be correct even when the light changes. We’re going to make a tweak to the white balance behaviour though to keep pictures looking natural.
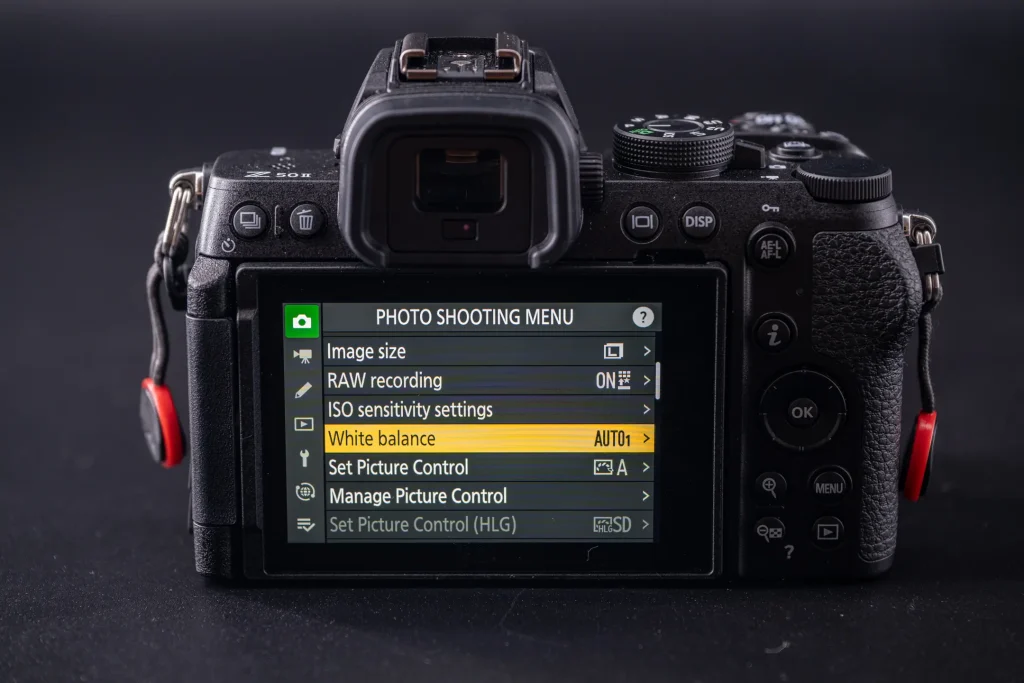
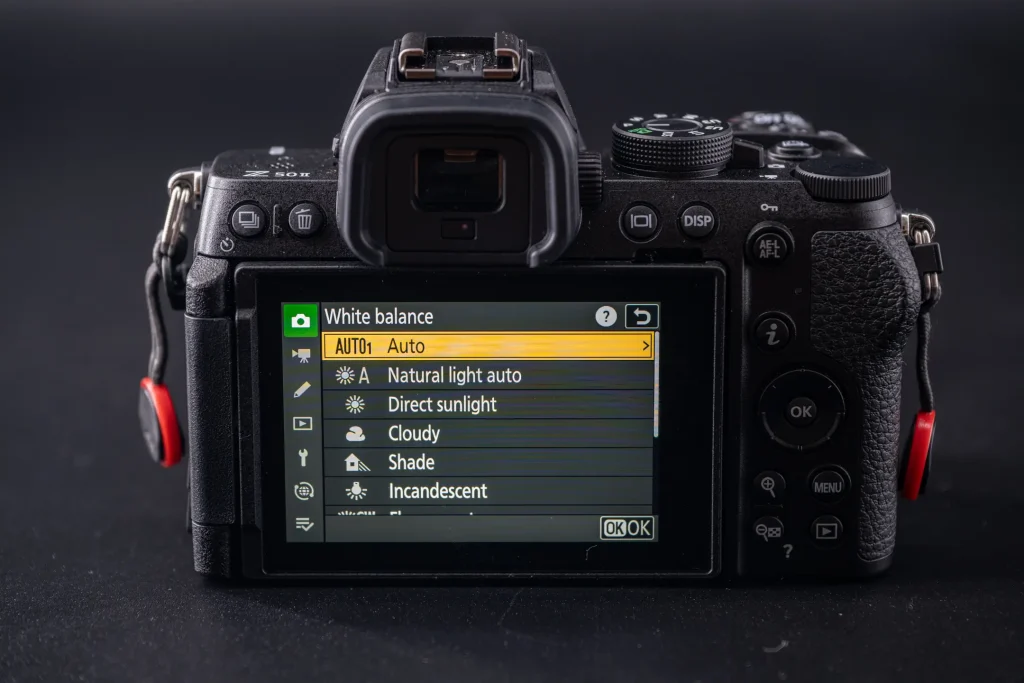
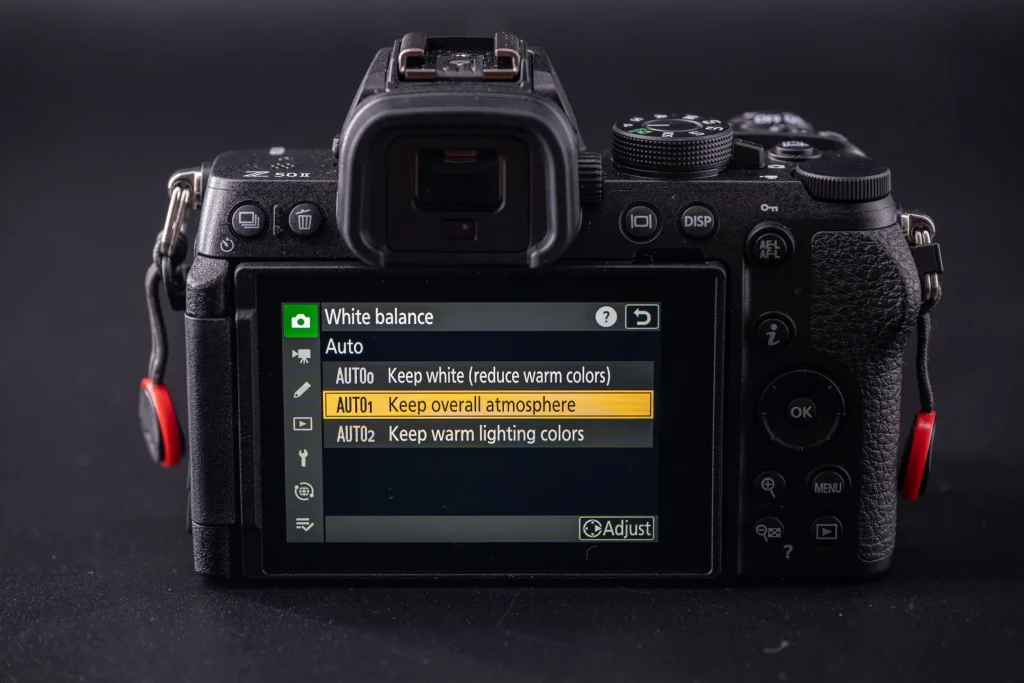
In the Photo Shooting Menu select:
- White balance
- Auto1:Auto
- Keep overall atmosphere
They are the only changes in the Photo Shooting Menu I would recommend making if you are brand new to the Nikon Z50II as a beginner. But next we need to take control of the autofocus because as good as cameras are these days, there are still times when you need to overide what the camera is trying to focus on or you will end up very frustrated.
Autofocus setup for beginners
I’m going to keep this section as simple as possible and offer the two best autofocus options for when you’re just starting out. This isn’t the complex “pro” setup I use, but that level of configuration simply isn’t necessary—or helpful—when you are still learning the ropes.
To focus the Nikon Z50II, simply half-press the shutter button to start the autofocus system. If you take your finger off the button, the AF system stops. To take the photo fully depress the shutter button after obtaining focus (indicated by a green AF box in the viewfinder or on-screen.
My recommendation for general photography is to start in Auto-area AF. This allows the camera to scan the scene and identify the subject, and the Z50II does an excellent job of selecting the right focus point.
To set this up: In the Photo Shooting Menu, select AF-area mode > Auto-area AF.
If the camera struggles to choose the right subject, you’ll want to take control. The easiest way to do this is by switching to 3D tracking mode.
The fastest way to switch: Press the i button, select the AF-area mode / Subj. detection icon, and use the rear control dial to select 3D-tracking. It’s just one click to the left.
How to use 3D-tracking: Once active, place the autofocus box over your subject and half-press the shutter button. While keeping the button half-pressed, you can move the camera to “recompose” your shot exactly as you wish. The Z50II will “stick” to your subject and retain focus, even as you shift your framing. It’s that simple—no complex button configurations required.
While I use other focusing modes, this setup keeps things simple and still allows you to get great results while not overwhelming with complicated setups and simply allows you to focus on taking pictures. When you eventually do want more control you can come back here to see how I have set up my own personal Z50II including the full configuration and customisations.
Viewing images
The last thing we are going to do is customise the playback operation and settings so that you can see useful information when you look back over your images.
By default, the Nikon Z50II gives very little information in when you look at the images you have taken. At the very least, we want to be able to see basic shooting information so you know what settings were used as well as ensure that your photo was correctly exposed.
To do this choose the playback Icon in the main menu. It’s a play button in a rectangle (4th from the top on the left hand-side.
Select playback display options and check the following:
- Exposure info
- Highlights
- RGB Histogram
Then press the Menu button to let the camera know you’re done.
Now when you look back through the photos that you have taken, you can cycle through the information by pressing display or the up and down buttons on the multi-selector. You will be able to see your exposure settings, any blown highlights (areas that are too bright) which will be flashing black and also a full histogram which represents the tonal values in your image, from dark on the left, to bright areas on the right.
Next, I always turn picture review off because it becomes irritating when it constantly shows you the photo that you have just taken and it interrupts your flow when taking multiple photos quickly. Select:
Playback menu> Picture review> Off
That is it for the basic setup of the Nikon Z50II. With the settings above you will be free to go out and start taking photos and get great results. To get those photos quickly on to your phone and to update the camera’s firmware to the latest version to ensure maximum performance, you should also download the Nikon Snapbridge app and connect your camera to it. I’ll walk you through that below.
Connecting the Nikon Z50II to Nikon Snapbridge
Firstly, download the Nikon Snapbridge app to your device. I use an Iphone and Ipad so I go to the App store. If you’re on Android then get it from the Google Play store.
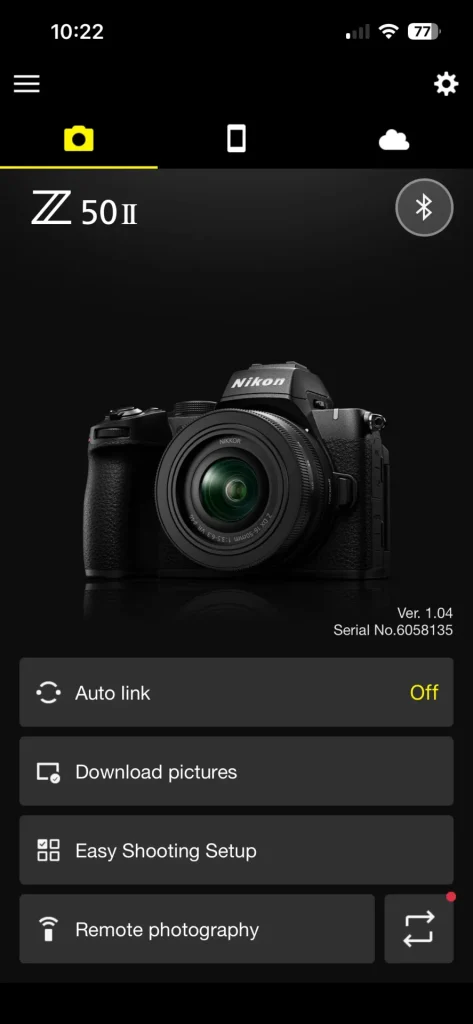
Once downloaded, open up the app. On the home screen, you will see a cog icon at the top right of the screen, tap on this and click Add camera. Select the correct type of camera (Z50II) which is the second option under mirrorless camera section.
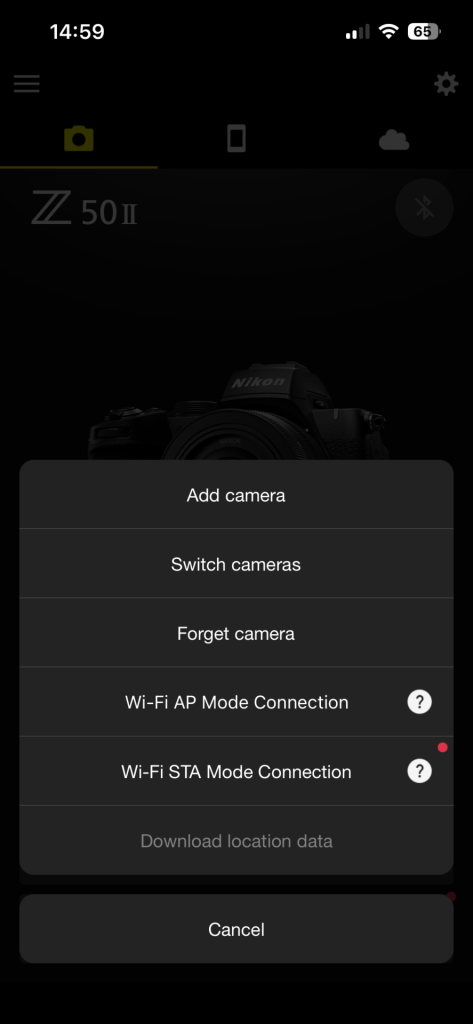
Next select Pairing (Bluetooth) and then:
On your camera’s menu, navigate to the Network Menu (second from bottom on the left)and select Connect to Smart device now select pairing (bluetooth) and then Start Pairing.
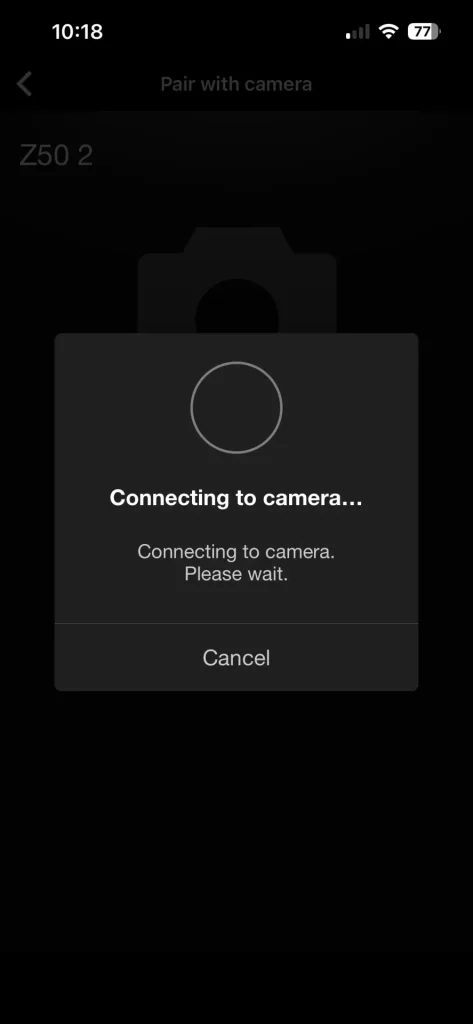
Your camera should now show as a bluetooth connection option in the Snapbridge app. Click on it. You will see a screen saying connecting to camera and then this screen may show for what seems like an eternity. Be patient as eventually your camera will show up on the select an accessory page.
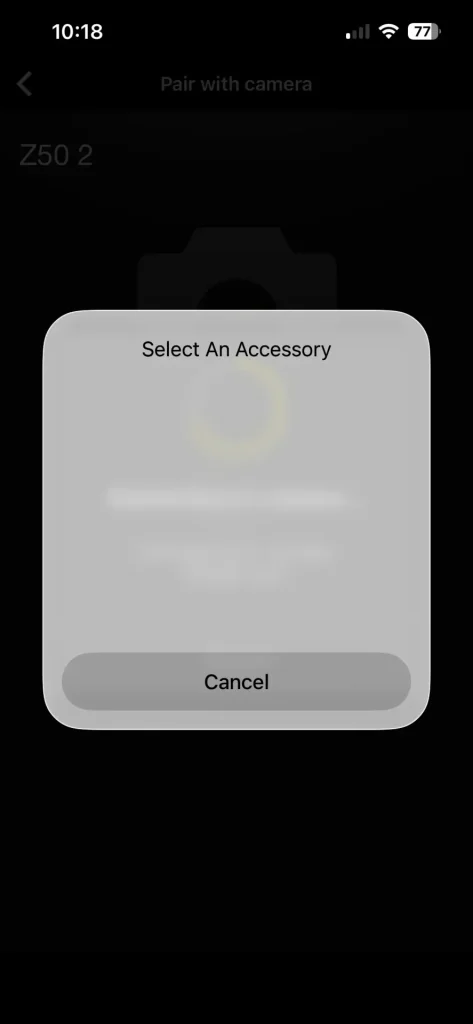
You will eventually see your camera ( i just did mine again for this article and it took about 1 minute for the camera to show up) in this list.
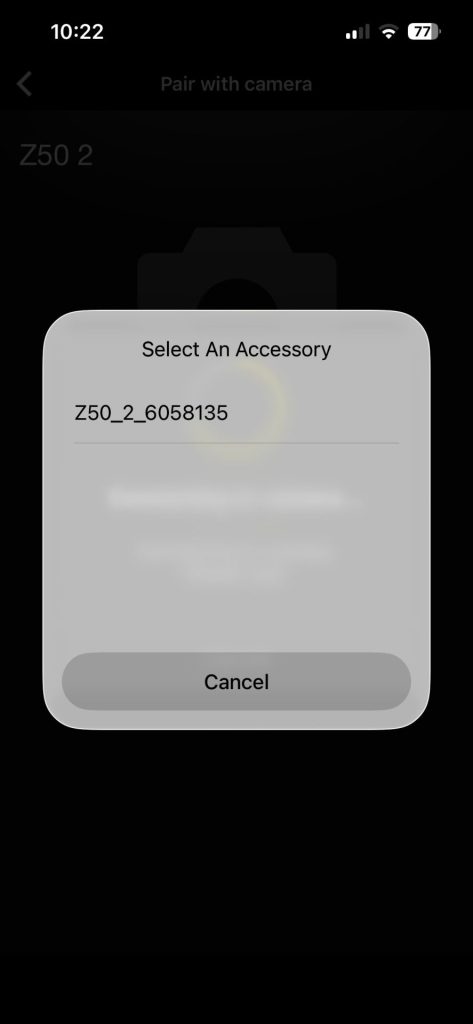
Select the on-screen options to pair and also confirm the pairing on the camera and you are done. A screen should pop up in the app saying ‘pairing complete, connected to camera. hit ok and you’re app and camera are now paired.
From the app you can download photos, update the firmware and control the camera remotely. There is also a feature called Easy shooting setup where you can download settings for specific shooting scenarios where it will load what Nikon deems the best settings for that shooting scenario.
Pro tip: Keeping SnapBridge connected also allows your phone to sync GPS location data to your photos—a lifesaver when you’re out in the Scottish Highlands and want to remember exactly where you took a particular shot.
The app will automatically tell you when there is new firmware for the Z50II and you can simply press the notification and follow the on-screen instructions to update your cameras firmware wirelessly via the app. Just make sure you have plenty of battery power remaining on your device and camera. I’ve updated the firmware on my Nikon Z cameras many times and it works flawlessly.
The Nikon Z50II is a fantastic camera when just starting out. it’s light years ahead of the camera I learned photography on and as I continue using it here in Scotland, I’ll be writing more articles about it, publishing more advanced custom setup guides as well as putting it through its paces for a wide variety of subjects. I hope you found this setup guide useful but if there’s anything that I missed or that you would like to see included then please feel free to comment down below.
Hey David,
Thank you so much for the detailed guide. I’ve got a Z6III and bought my girlfriend the Z50II and really like it so far. I’m excited to work with her together on photography and just wanted to say I love your blog!
Hi Dylan,
Thanks for your comment. I’m so glad that you found it helpful. What a lovely way to spend time together.
All the best
David