
This is how I set up my Panasonic L10 for general stills photography—including street, travel, and everyday shooting. The L10 is a capable compact camera, but out of the box it has a few quirks that get in the way of capturing the shots you want. For alternatives see my guide to the best compact cameras.
In this guide, I’ll walk you through the exact settings I use to maximize image quality, speed up the zoom, and iron out those factory defaults so the camera actually becomes a pleasure to handle. Having worked as a full-time photographer for over two decades across virtually every camera system, these tweaks are designed to cut out the menu-diving and shorten the learning curve.
If you want to skip straight to shooting, you can download my complete settings file below, copy it to your SD card, and load my exact setup onto your camera in seconds.
Download the Settings file – Make sure to unzip the file once downloaded and then copy the folder across to your SD card. Once you have the file on your SD card, go to Spanner Icon menu>save/restore Camera setting>Load and then choose the file named Cotswold.
For those who want to know how to make these changes themselves, read on. I only mention the settings that I change from default in order to keep this guide quick and useful.
Image Quality Menu
Image quality menu 1
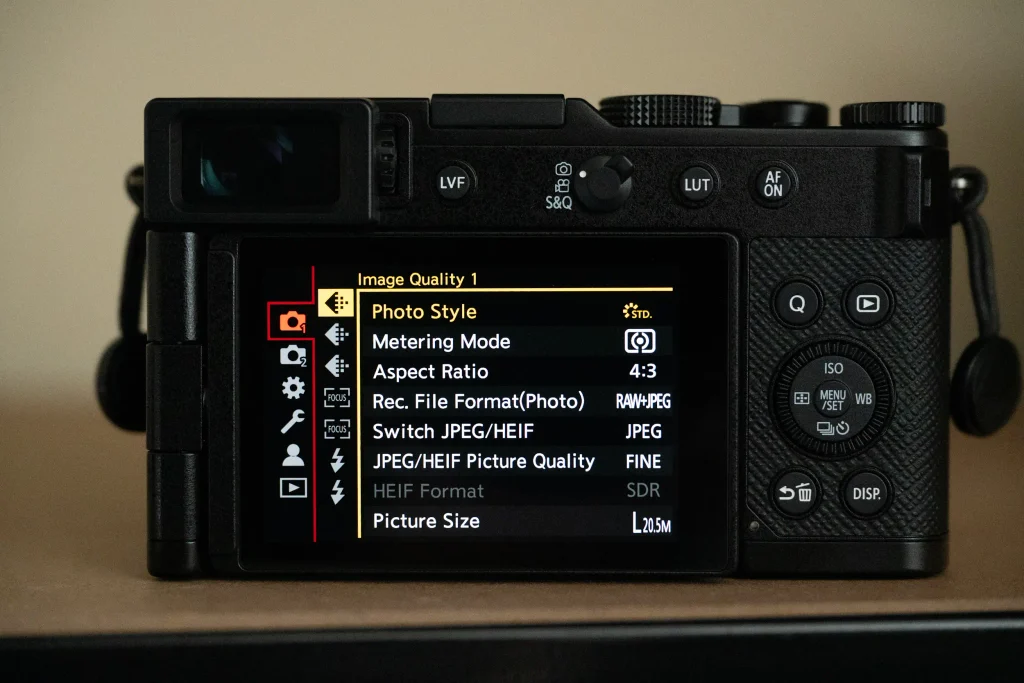
Record File Format — RAW + JPEG: I shoot both so I have ready-to-share JPEGs that look great straight out of the camera, alongside the RAW file as a backup whenever I want full editing flexibility later.
Switch JPEG/HEIF — JPEG: I stick with JPEG for universal compatibility across devices. While HEIF offers slightly smaller file sizes and marginally better quality, the compatibility trade-offs aren’t worth it for my workflow.
JPEG/HEIF Picture Quality — Fine: Delivers the highest possible image quality with minimal compression.
Picture Size — Large: Captures maximum resolution for the finest detail and the most flexibility when cropping or printing. There is no point buying a premium compact camera and immediately compromising on resolution.
Image quality menu 2
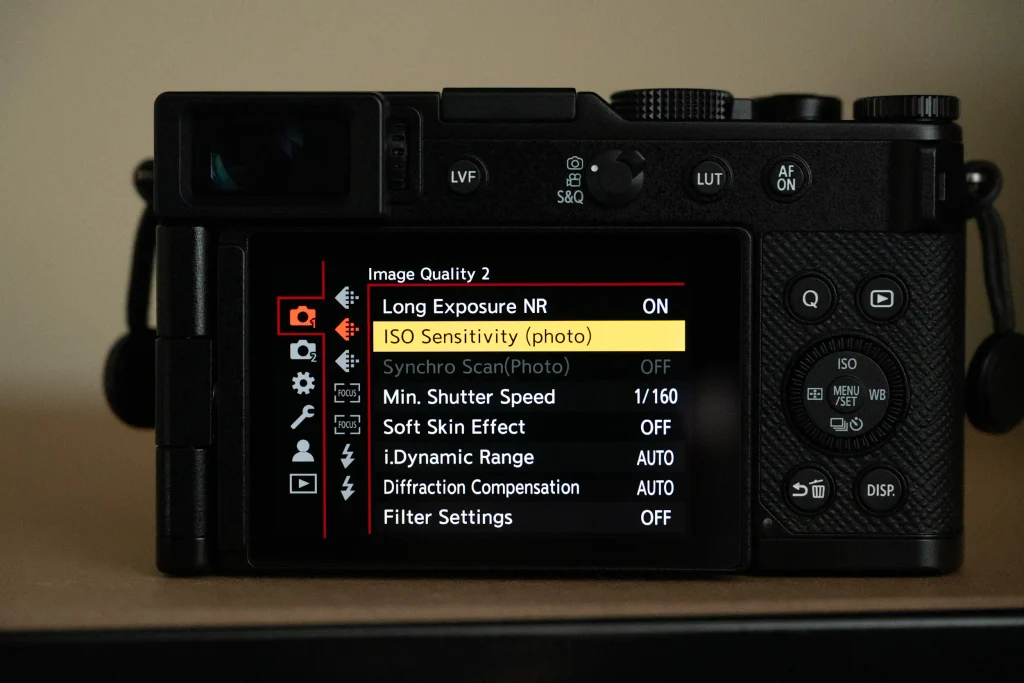
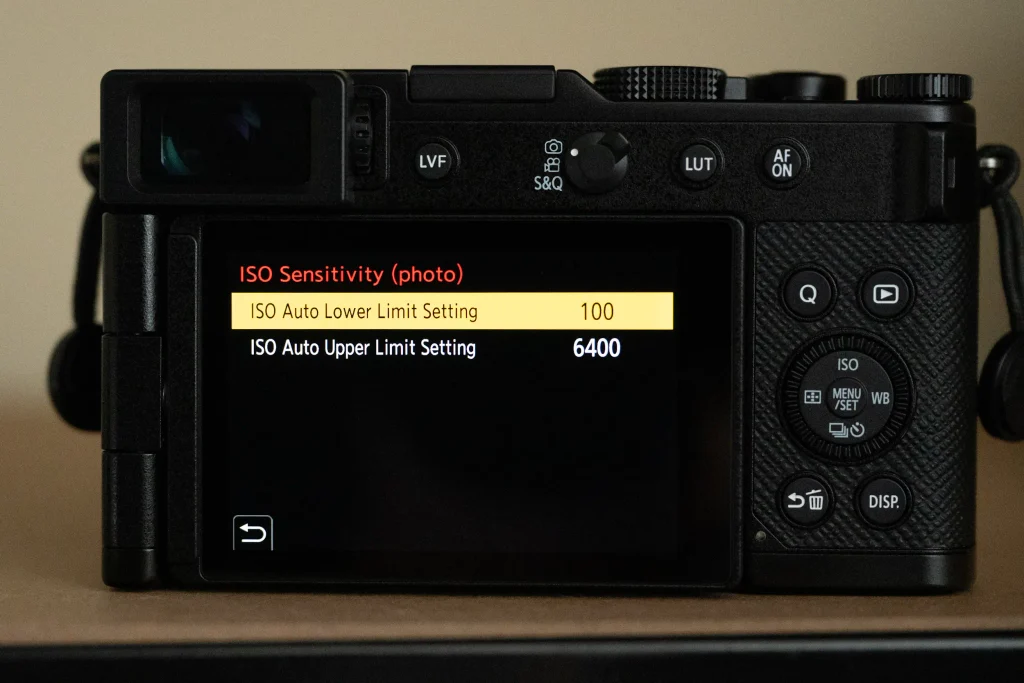
ISO Sensitivity (Photo) — Auto ISO Lower Limit: 100 | Upper Limit: 6400: Caps the range Auto ISO can use. ISO 6400 is the practical ceiling on the L10 before noise starts degrading fine detail and color fidelity.
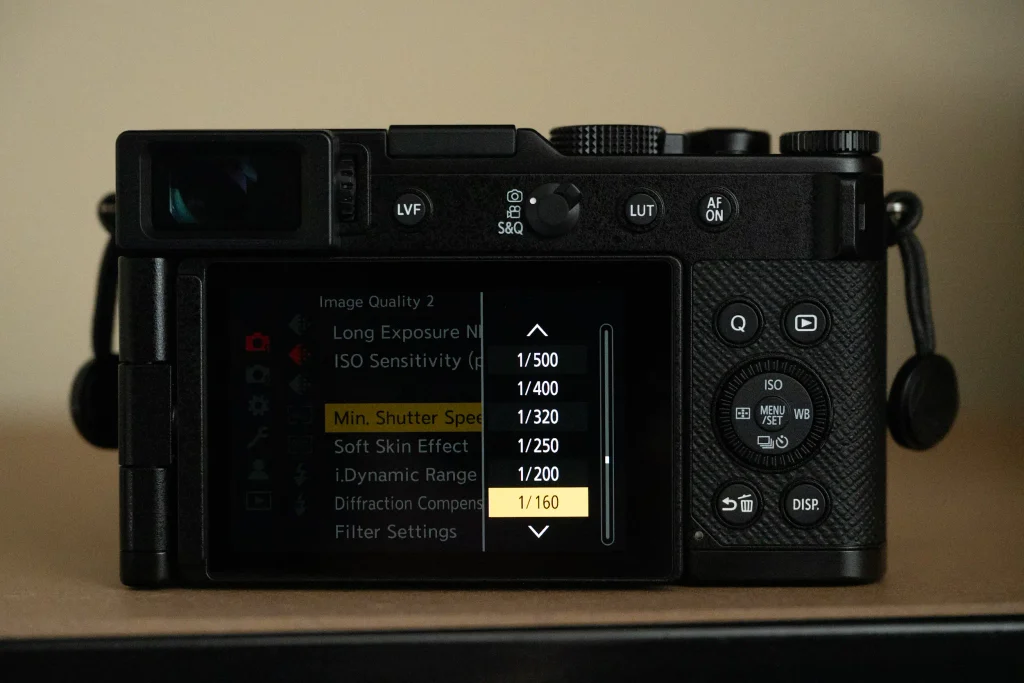
Min. Shutter Speed — 1/160s: Instructs Auto ISO to keep the shutter speed at or above 1/160s whenever light allows—the slowest speed that reliably freezes everyday human movement without motion blur. In low light, the camera will automatically drop below this threshold to maintain exposure. (Tip: If you only shoot static subjects, set this to Auto so the camera scales shutter speed to your focal length automatically.)
Auto Focus Settings
Set up your Panasonic L10’s standard AF mode to 1 Area + AF for general use. I have tested the autofocus on the L10 extensively and although I use Zone focus on most of my other cameras as it offers a wider area it doesn’t work on the L10 very well. If you are in Zone focus on the L10 the camera will often ignore your focus box entirely and simply focus anywhere it wishes within the frame which results in out of focus shots and inconsitency that will be frustrating. In 1 Area + the camera only focuses within your AF target area unless you switch subject detection on.
Focus Menu 1
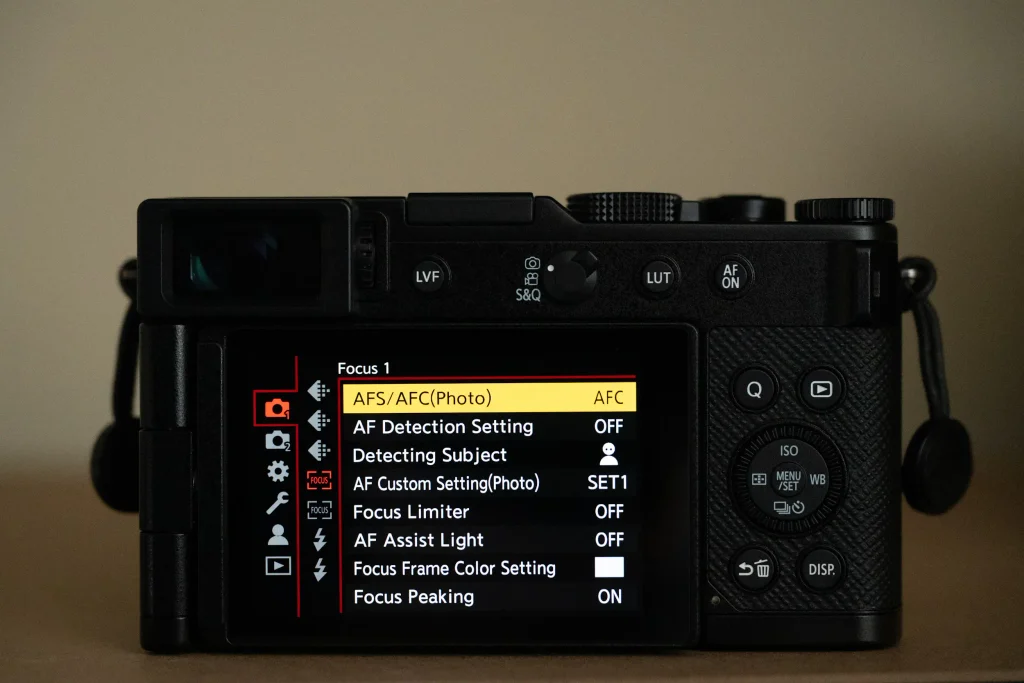
AFS/AFC (Photo) — AFC (Continuous): I shoot in continuous autofocus roughly 90% of the time. The L10’s Phase Hybrid AF is fast, accurate, and fully capable of tracking everyday action without needing to lock down manually on static subjects first.
AF Detection Setting — OFF: I leave face/eye detection turned off by default here. Instead, we’ll map a dedicated button later in the guide so you can toggle it on and off instantly when you actually need it.
Detecting Subject — Human: When subject detection is active, I keep it locked to Human as it covers the vast majority of my street and travel subjects.
AF Assist Light — OFF: Kept off to avoid blinding or distracting people in low-light indoor or evening environments.
Settings Menu (Spanner Icon)
Image Quality
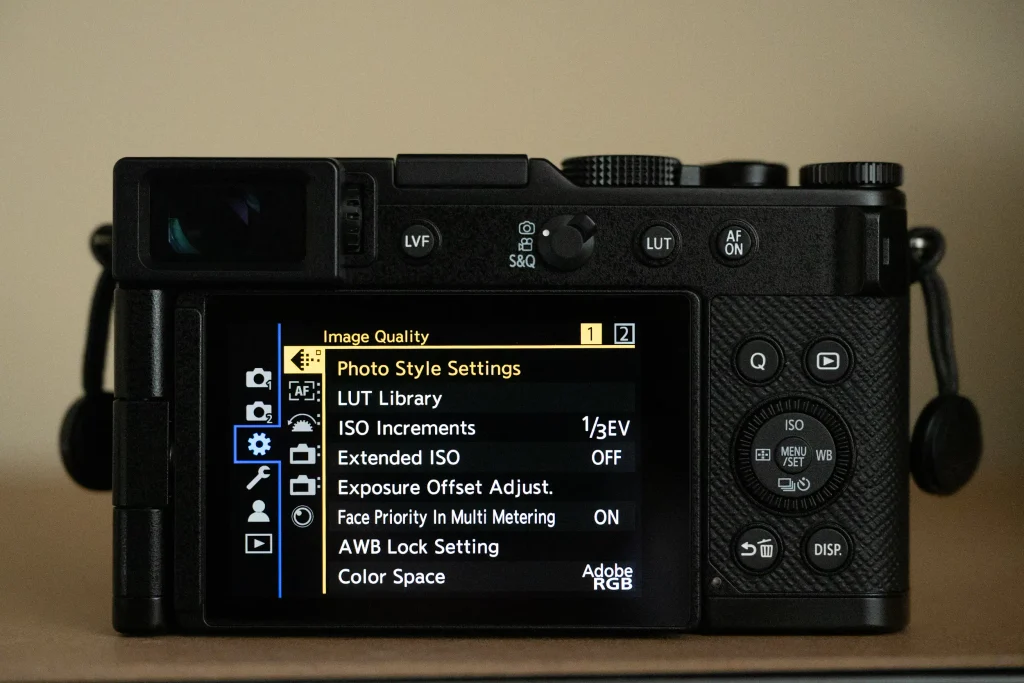
Face Priority in Multi Metering — ON: Ensures that when people are in your frame, the camera prioritizes correct exposure for faces over the wider scene. It makes nailing well-exposed portraits quick and effortless.
Color Space — Adobe RGB: Because I print my work, I use Adobe RGB, which covers a wider color gamut for better-looking physical prints. Note: If you don’t print your photos, switch this to sRGB, which is the universal standard for screens and online publishing.
Focus/Shutter Menu
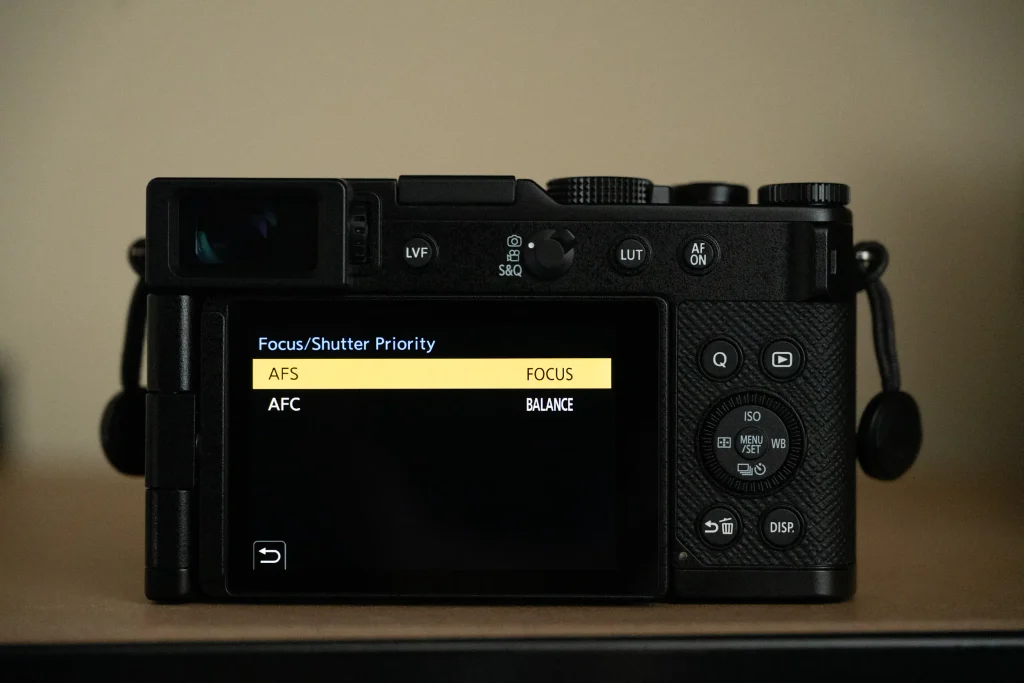
Focus/Shutter Priority — AFS: Focus | AFC: Balance: In single-shot autofocus (AFS), you want to ensure the camera only trips the shutter once focus lock is 100% confirmed. In continuous autofocus (AFC), strict focus priority can introduce a tiny delay between acquiring focus and firing, causing you to miss fast-moving moments. Setting AFC to Balance gives equal weighting to shutter speed and in-focus shots so you don’t miss the shot.
Focal Range Display — ft: Being British, I think in feet and inches, so I set this to imperial measurements.
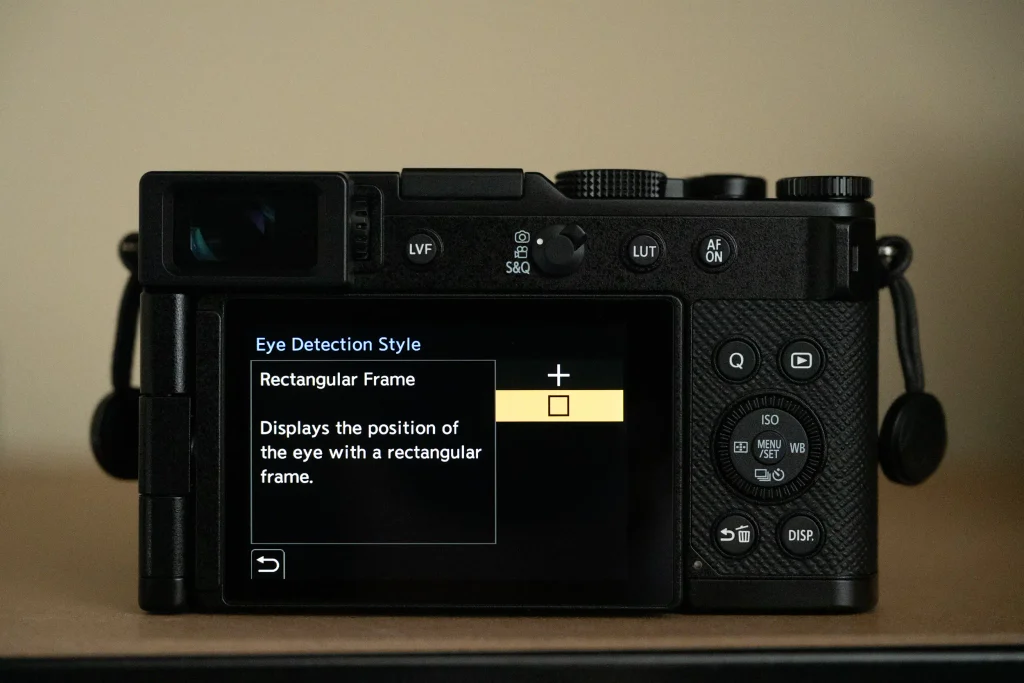
Human Eye Detection Display (Eye Detection Style) — Square Box: I’ve never liked Panasonic’s old crosshair focus display dating back to my GH camera days. I was glad to see they allow you to select the square box option around the eye, matching virtually every other manufacturer and making focus confirmation much easier to track.
Operation Menu
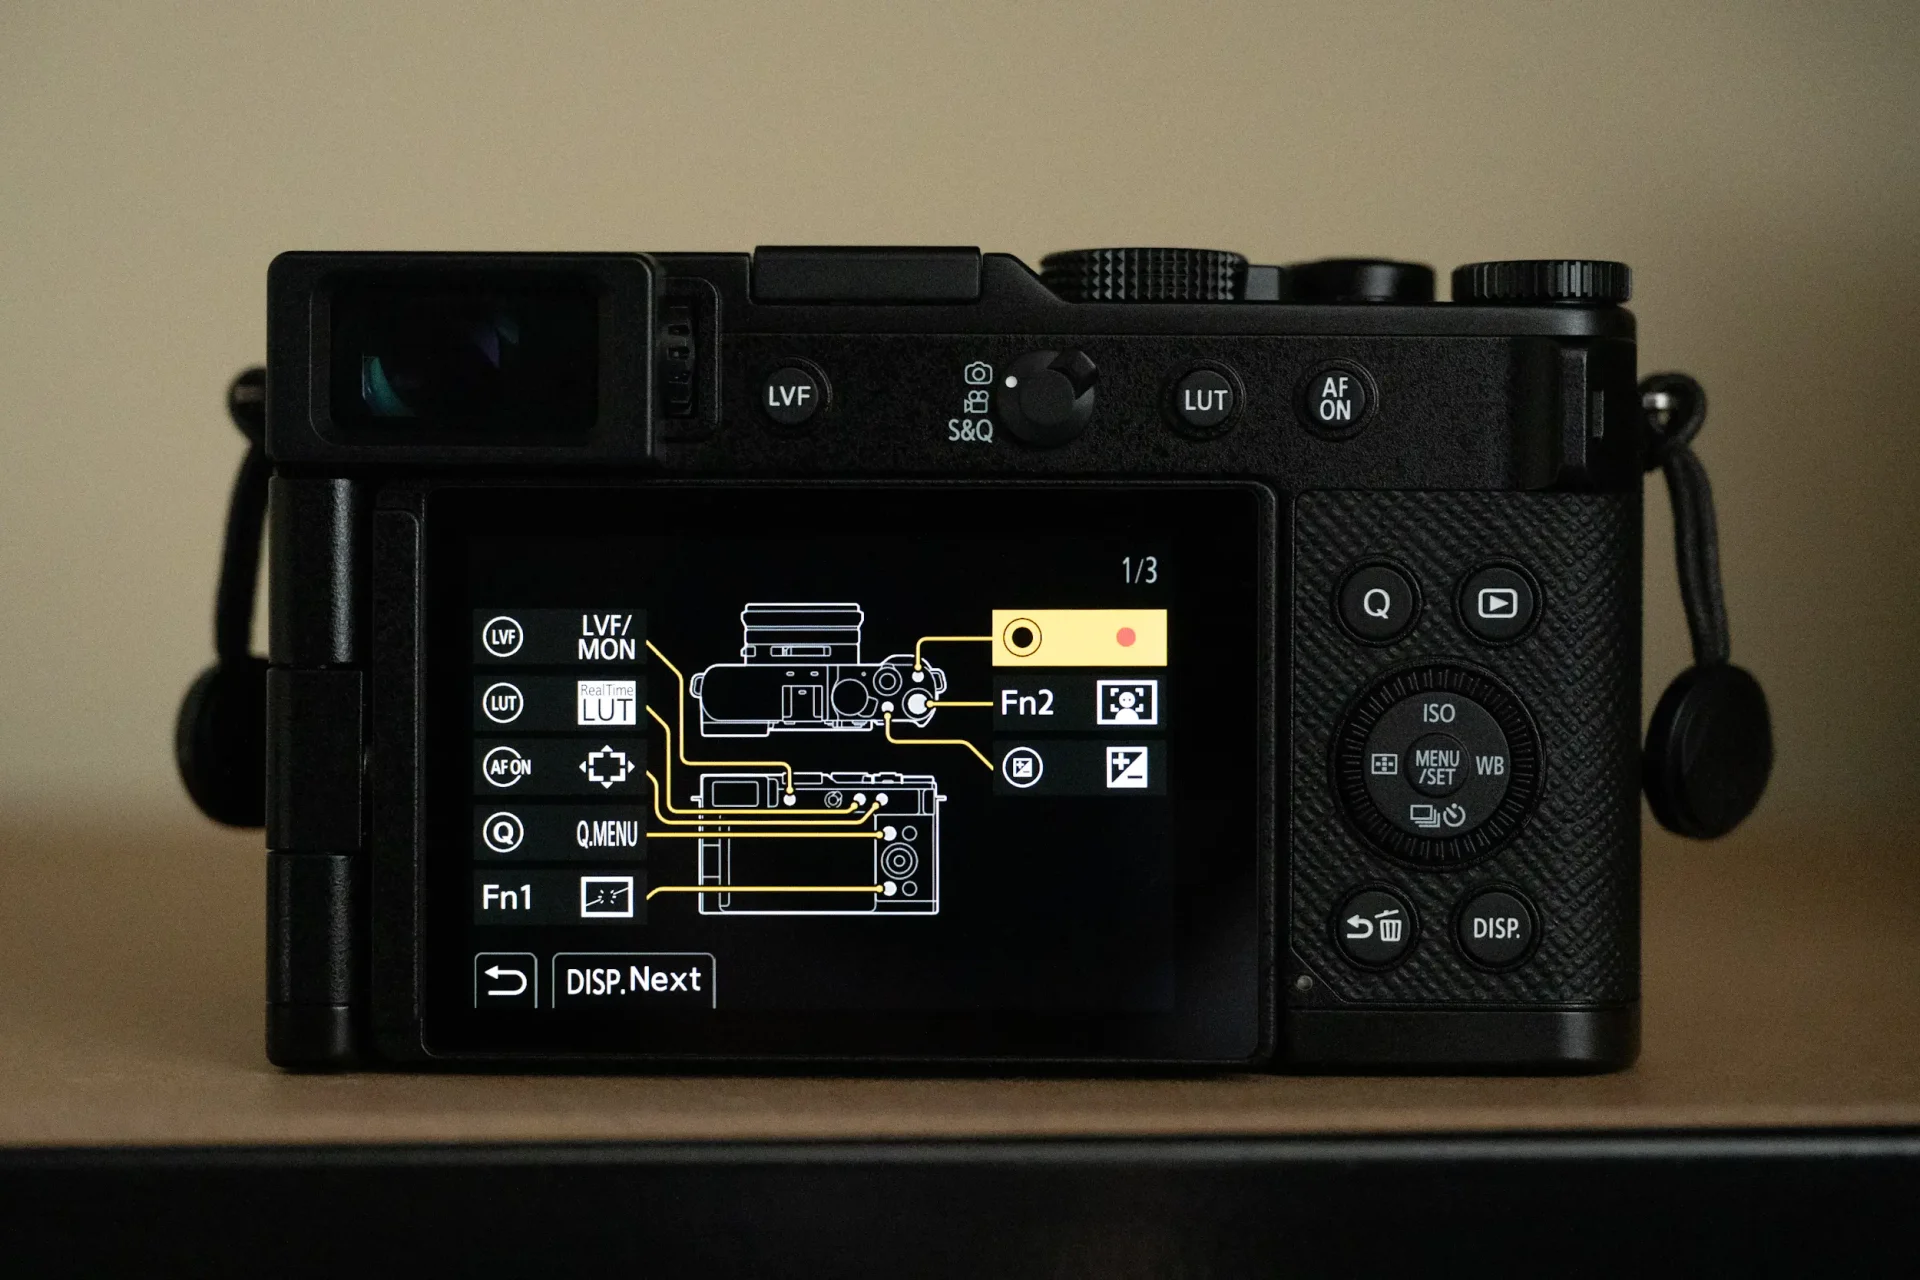
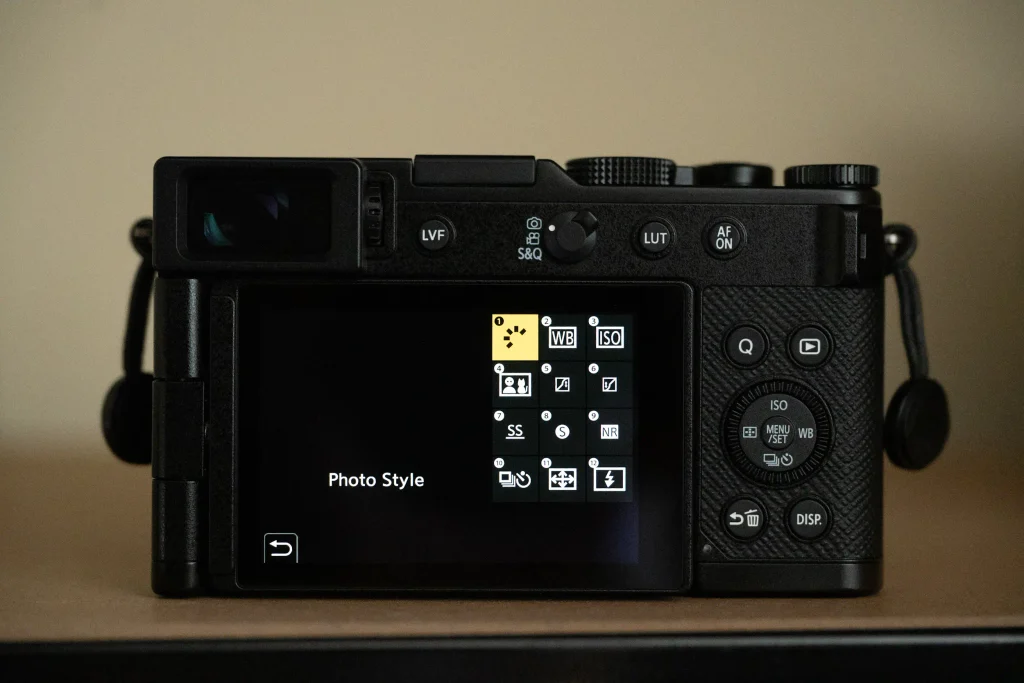
Q Menu settings. I have attached a screenshot below of my Q menu settings which combined with the custom Fn buttons we will set up later give quick access to all the most important shooting options.
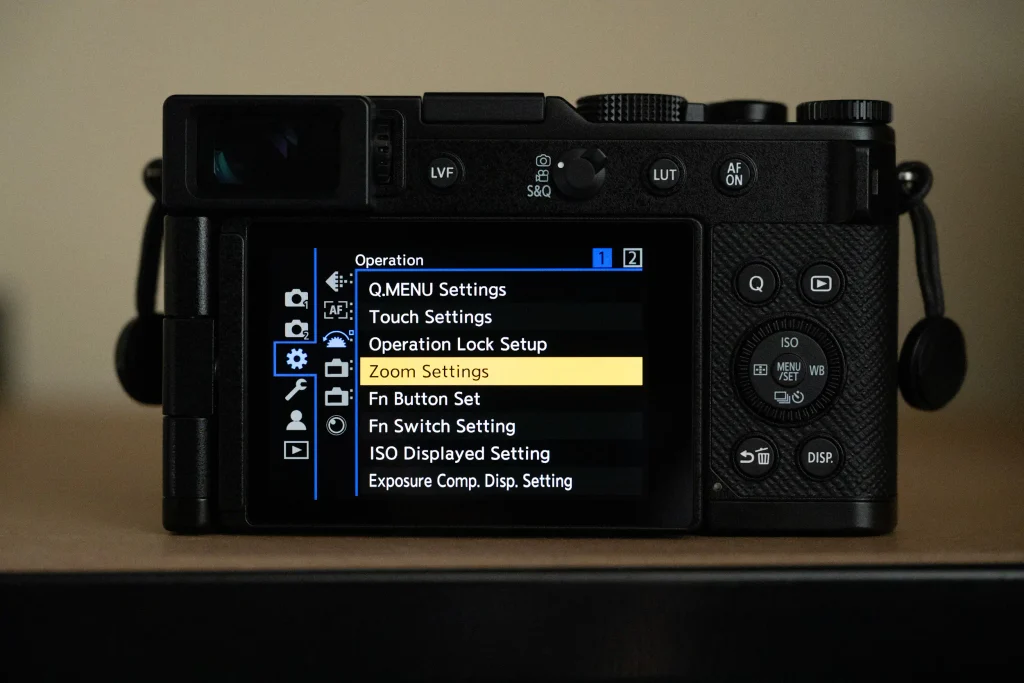
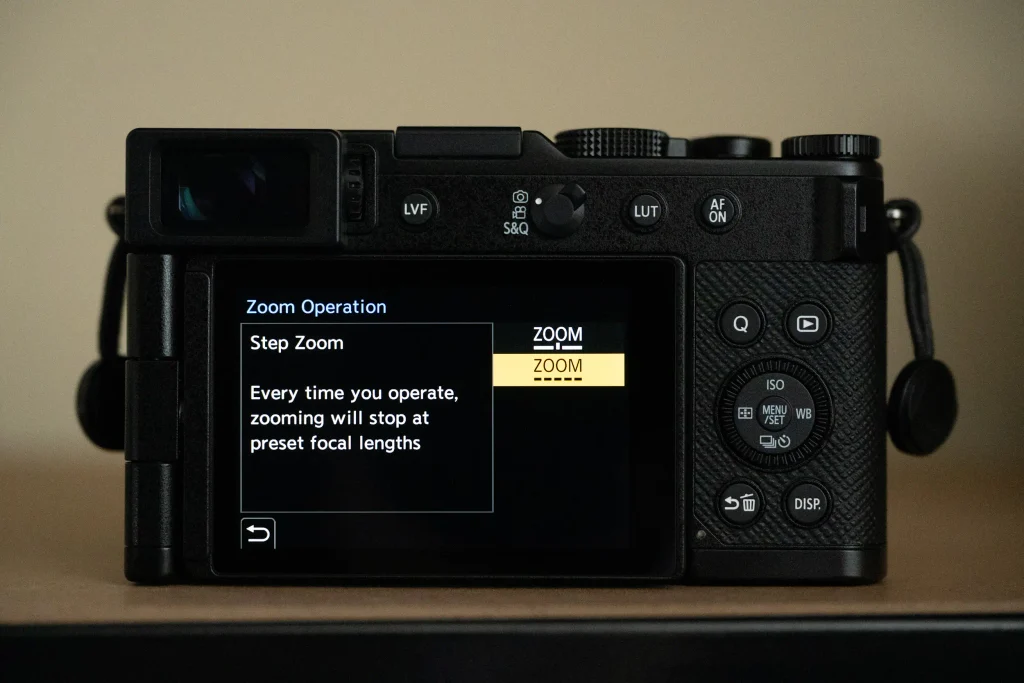
Zoom Settings: Zoom Operation — Step Zoom: By far the quickest way to zoom on the Panasonic L10 is to have the zoom lever automatically jump straight from one focal length to the next. The step-zoom increments map to classic prime focal lengths: 24mm, 28mm, 35mm, 50mm, 70mm, and 75mm. A single flick of the lever to the right snaps the lens directly to the next preset focal length, while moving it left drops it back down. Bypassing the smooth continuous zoom avoids the sluggish lag and eliminates the constant micro-adjustments required when trying to land on an exact focal length using the control ring.
Fn Button Customization & Quick Access
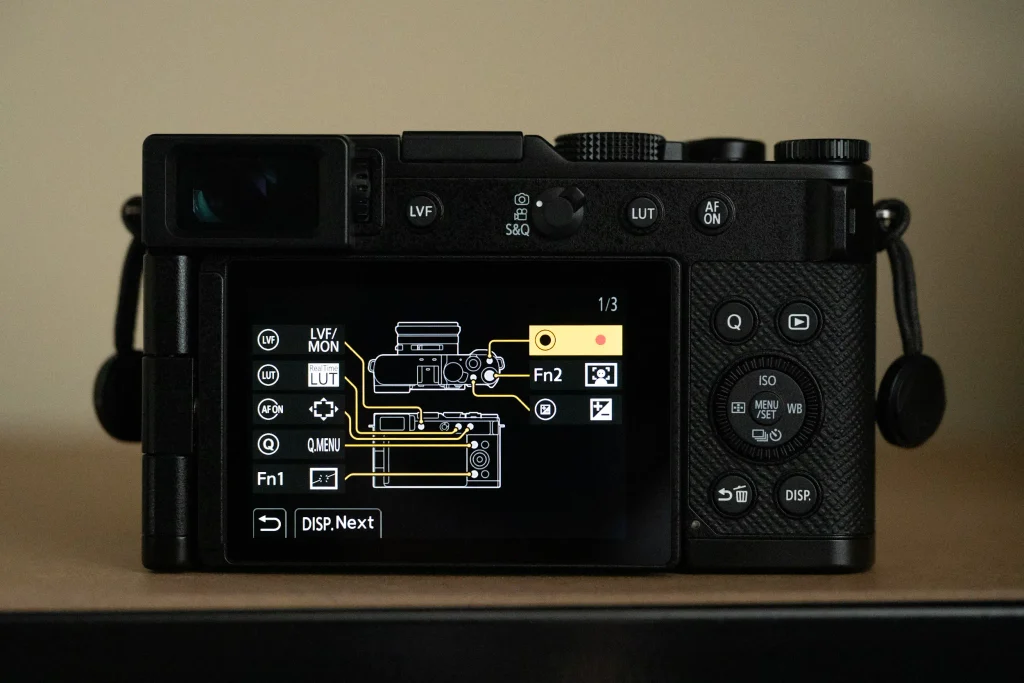
- Fn Button Set (Setting in Photo Mode) — Fn2: AF Subject Detection Setting: Mapped to Fn2 so you can instantly toggle subject detection on and off with a single button press.
- AF-ON Button — Focus Area Set: By default, the L10 requires too many button presses just to move your AF target area around the frame. Setting the AF-ON button to Focus Area Set gives you one-touch access to instantly shift your focus point across the screen without menu diving.
I leave the remainder of the custom function buttons at their defaults, as these two tweaks solve the biggest issues in daily shooting. Of course, you can set the other buttons up however you wish.
Fn Switch Settings
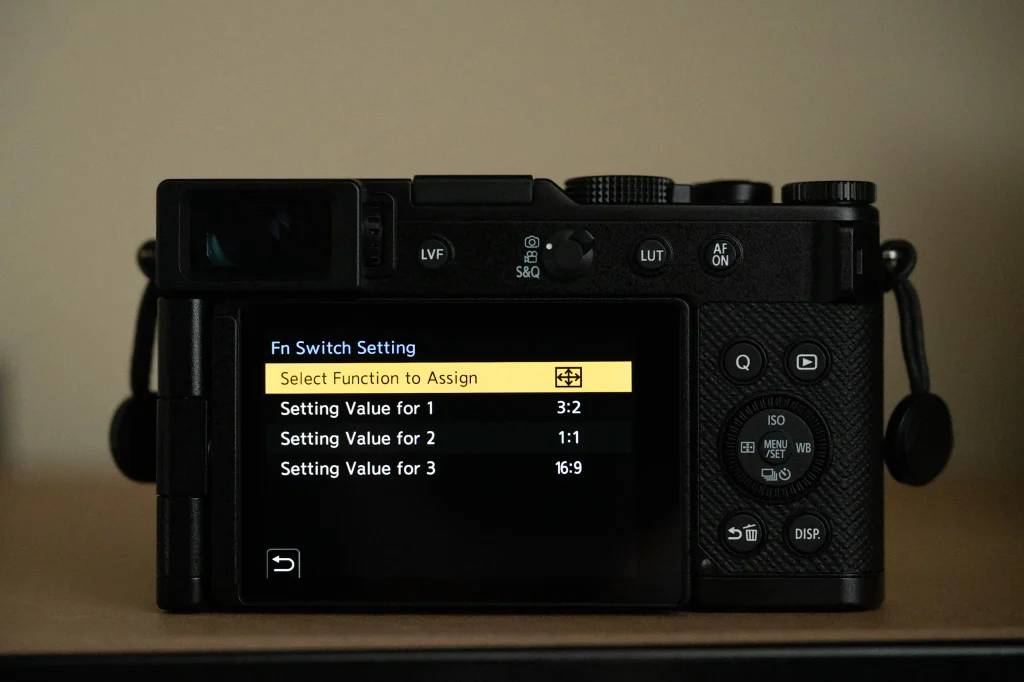
There are a couple of controls on the lens of the Lumix L10 and one of the touted benefits of this camera is the ability to use different aspect ratios without losing resolution. I have assinged this function to the Fn Switching dial as follows:
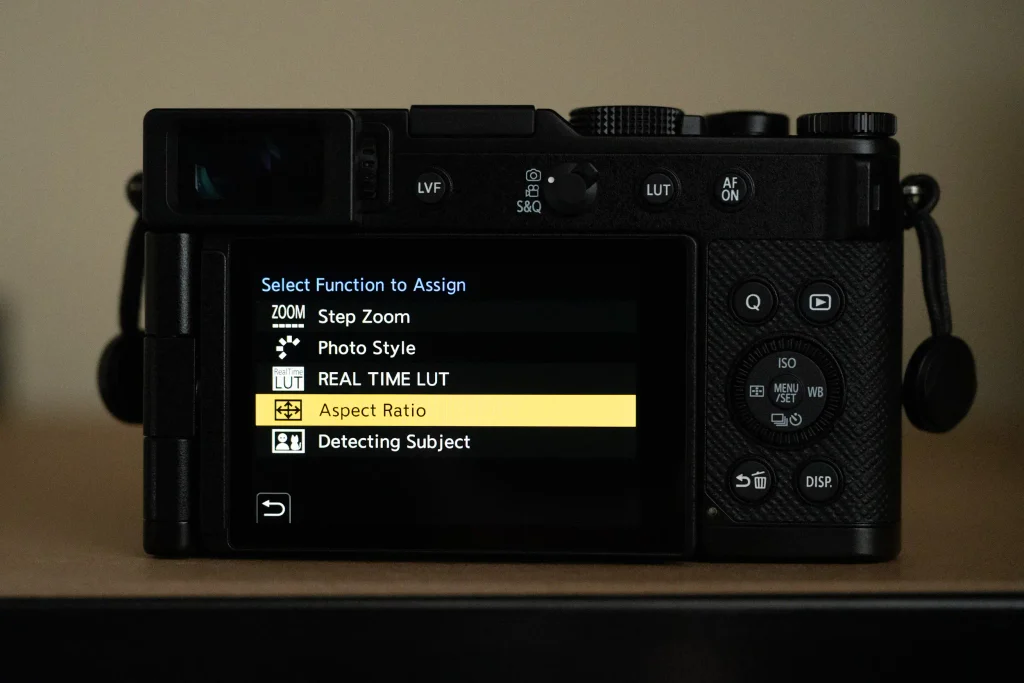
Fn Switching Setting: Aspect ratio – Setting for Value 1 3:2, Setting for value 2 1:1, Setting for Value 3 16:9. The Fn switch dial is quite awkward to use when your shooting with the camera and seeing as though I rarely change my aspect ratio I place it here so on the odd ocassion I do want to use it, I can but if this was a function I used more often, I’d place the ability to change it elsewhere.
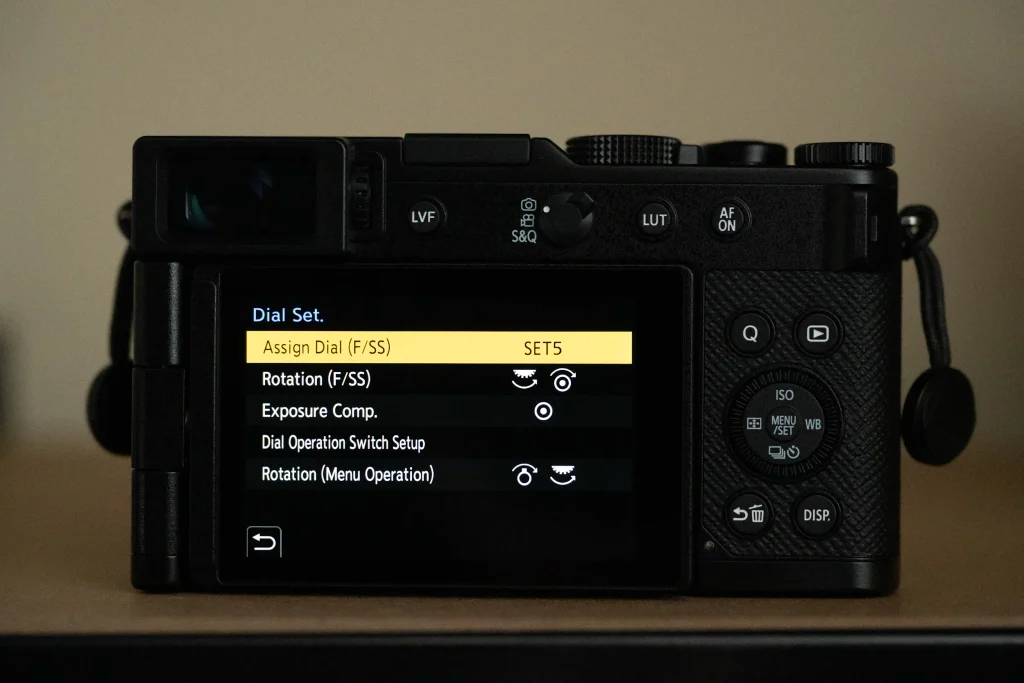
Dial Set: Assign Dial (F/SS) – Set 3. In its default state the L10 duplicates the function of the dials when shooting in manual mode whereby apreture is controlled both by the aperture ring on the lens and by the rear dial, leaving you to have to adjust shutter speed via the D-pad ring located around the Menu button. This is incredibly frustrating to use and initially resulted in me wondering where on earth I was supposed to control shutter speed from.
Monitor/Display (Photo)

Histogram: On – I always want this on as you cannot always ensure the correct exposure just from the image on the screen. This helps to ensure you protect your highlights.
Blinking Highlights: On – This option will quickly tell you if any areas of your photo are overexposed when you check it after taking your shot.
Lens/Others

Lens Focus Resume: On – I leave this on so that when turning the camera back on, the camera remembers the last focal length that you used. it’s incredibly useful so that you can quickly pick up where you left off.
In/Out
Beep: beep Volume – Off
AF Beep Volume: Off
Changing the EVF display
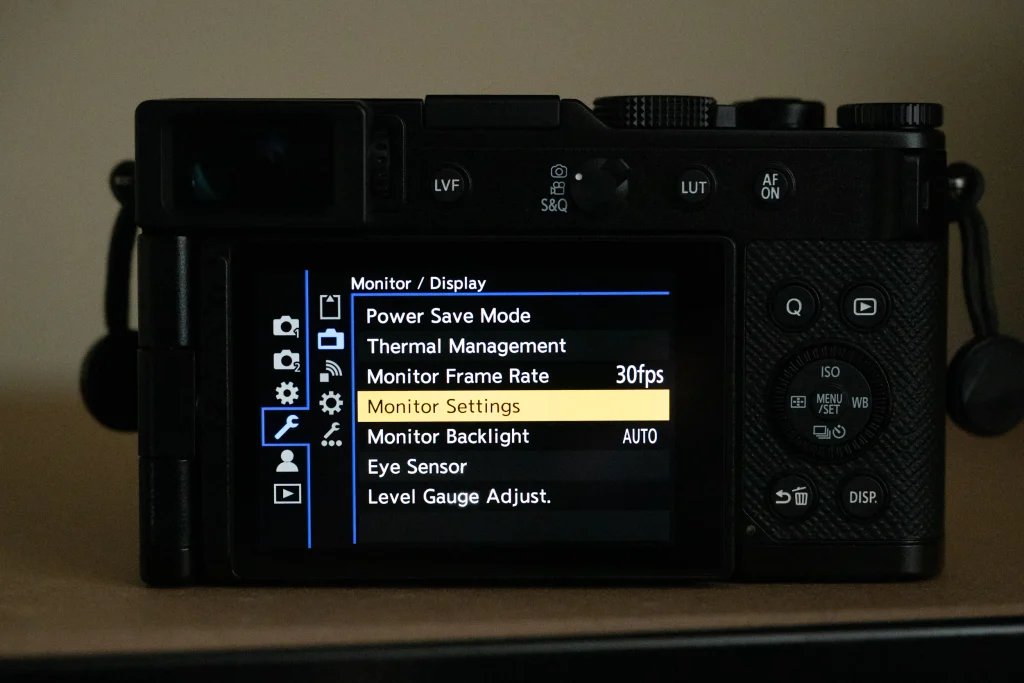
When I first shot with the Panasonic L10, I found that the viewfinder image did not match the rear screens image very closely. When switching between the two it was offputing as the rear screen was showing more colour and contrast than the viewfinder. To correct this I adjusted the EVF settings to more closely match the rear screen.
To do this go to Spanner Icon> Monitor/Display> Lift the camera to your eye and select Viewfinder Settings (note that if you try to do this by looking at the rear screen you will adjust the rear screen settings if you see an option called Monitor Settings).
I have changed the viewfinder settings as follows:
Contrast: +1
Saturation: +1
Red Tint: +1
The Panasonic L10 is the latest compact camera and one that a lot of people have been calling for, for a long time. it may not be as small as some people wished for but what it does offer is a geuineinly compact shooting experience that covers a lot of bases with it’s excellent zoom range, image quality and handling. With the changes made in this settings guide, it also becomes logical and fun to shoot with and rmeoves some of the slightly strange control choices that it comes with out of the factory. Don’t forget to download the settings file if you want to get your camera setup quickly. I hope the article proves helpful and helps you to enjoy your camera and remove some of the guesswork. I’m going to start accessorising my L10 this week to make it even better to shoot with and I hope to get the chnce to take it away with me on some trips with my eldest daughter soon.
For more on the Pansonic L10 see these articles.