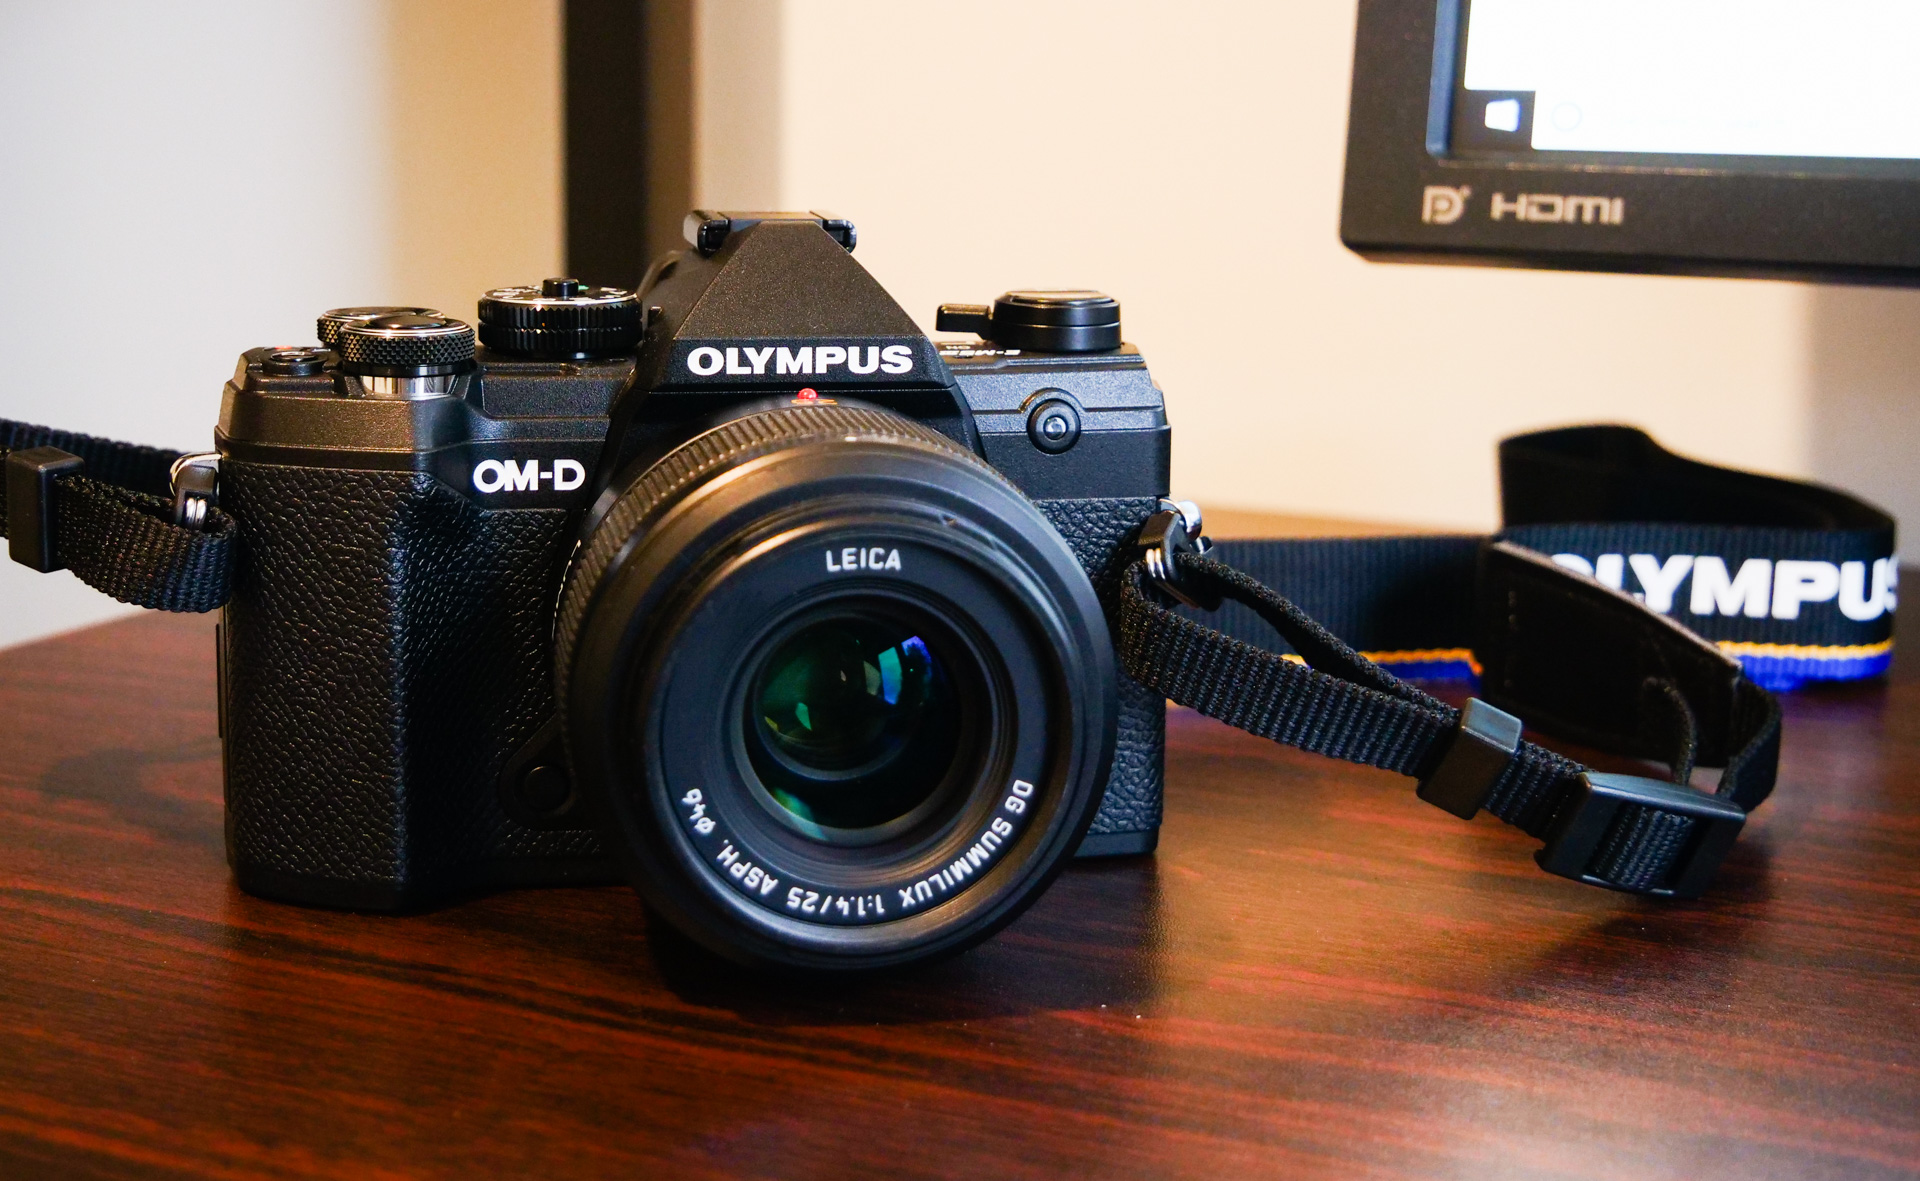
Fujifilm XT4 Review in 2021

Fujilm XT4 Review in 2021

The Fujifilm XT4 was released in April 2020. In that time many other cameras have been released by various manufacturers. So I wanted to review the Fujifilm XT4 in 2021 to see how it performs. If you want to see how the Fuji XT4 compares with the X-Pro 3 then take a look at this article 

If you would prefer to see a quick video on why you should buy the Fuji XT4 then you may want to check out my latest video instead. Alternatively you can see my Fuji XT4 video review which is now up on Youtube

The Fujifilm XT4 that I am reviewing is my own. I purchased it in October 2020 as it featured several important upgrades over the XT3 that convinced me that the XT series could finally be my main camera system. So here I am in 2021 reviewing the Fujifilm XT4. I now own the Fuji XT5 and have starting adding content about that camera here

The XT4 is Fujifilm’s top of the range X series camera. It uses the same 26mp X-Trans sensor as the previous generation of X series bodies. Having experience with the XT3 I already knew that the image quality that can be achieved with this sensor is excellent both in terms of resolution, dynamic range and high ISO performance. I will include sample images below just in case you are unaware of how this sensor performs.

Original raw capture
Shadows pushed all the way in Lightroom
100% crop of above image shows very little noise in the shadows

For me, the image quality that I would get was a known quantity and one that I knew I was happy with. However, the upgrades that made me look more closely at the XT4 were more on the handling side of things.

As I spend a lot of time out shooting with my family in tow, I often find that I don’t carry a tripod on these types of trips. Having been a long-time user of Olympus cameras and their excellent IBIS (in body image stabilisation) the inclusion of IBIS in the XT4 was a very welcome addition. So how well does the IBIS work? I wrote an OM System OM1 review too


With the Fuji 10-24mm f/4 lens attached the IBIS in the XT4 works alongside the OIS in the lens to give a claimed 6 stops of image stabilisation.

100% crop @10mm 0.4 Seconds

I took a series of images to see just how effective the IBIS was. Normally I can get sharp hand held images on the 10mm end of this lens shooting at 1/20th second. If the shutter speed drops any lower then my keeper rate goes down. 1/15 of a second and below and it becomes a bit hit and miss.

With the IBIS turned on I found that I could consistently get sharp handheld photos at 1/3

to ½ a second. This is with excellent technique. If I shoot in a more casual manner, then I cannot achieve sharp images with slower shutter speeds than 1/5 second.

So, the XT4 IBIS in combination with the OIS in the 10-24mm lens is giving me approximately 4 stops of stabilisation at the wide end.

100% Crop @200mm 1/10

I repeated this experiment using the Fuji 55-200mm lens and found that I could consistently get sharp handheld images at the 200mm end at 1/10 second whereas normally I would have to be shooting at 1/320 giving me around 5 stops of stabilisation.  This is pretty much in line with what Fuji says the XT4 IBIS will give you alone and about a stop under the 6 stops they claim the combined IBIS and OIS of the lens will give.

Overall the IBIS is not quite as effective as that found on the Olympus EM1 III where I could regularly handhold wide angel images at 1-2 seconds but I’m still happy with it when you take into account the larger APS-C sensor found in the XT4 giving you better ISO performance. It allows me to just about get down to speeds where I can add an element of motion to water which is the main reason I would be shooting at those shutter speeds.

Build quality and handling

When I first opened the slick black packaging of the Fuji XT4 and held the camera in my hand I was very pleasantly surprised. My previous experience with the XT series ( I have owned the XT1 and XT2 and tested out the XT3) was that they are well made but always felt a little hollow. I was not a fan of this feeling as I like a camera to feel solid in my hand. I take my gear all over the World and I want it to feel as if it can stand up to some serious work.

The XT4 immediately felt better and much more solid. Yes, it weighs a little more at 607g vs 539g for the XT3 but it feels much better built, does not have that hollow feeling and the grip has been enlarged which makes it much more comfortable in the hand. It is now 2mm wider and 5mm deeper than the XT3 at 135 x93x 64mm. The size now seems just about a perfect compromise between feeling solid, well-built and comfortable in the hand without being too bulky or heavy. Please do not change this Fuji as I think you nailed it this time.

The shutter mechanism is now rated to 300k actuations compared with 150k on the XT3. This alone speaks to the improved build quality and gives me confidence that the XT4 will easily cope with professional use.

LCD Screen

One of the most significant (and controversial) changes comes in the form of a fully articulating rear LCD. I know that some Fuji fans prefer a standard or 3-way tilt screen as found on previous generations, but I find a fully articulating rear screen to be the most flexible solution. It allows you to tilt up and down as well as front facing when horizontal and it also allows you to flip it 90 degrees to the camera body when shooting in portrait orientation. Not to mention that you can conveniently close it so that the screen faces in towards the body and is protected from being scratched or damaged. I understand that for ‘from the hip’ street shooting it may be less balanced and subtle but I rarely do that so don’t miss that ability.


The fully articulating screen is great but note the mic prot cover which is fiddly in use.

While I love the screen, I do have one gripe with it. Well actually its not with the screen itself but with the cheap flappy port covers for the mic and remote sockets. They get in the way when you are setup for video and then want to flip the screen from rear facing to forward facing. I wish Fuji would have made them removable but they didn’t. Inexplicably they did decide to make the memory card door removable. Surely that is the wrong way around.

Battery

Lastly the other change that was especially important to me was the use of the new NP-W235 battery which lasts much longer than the older generation NP-W126s found in the older generation cameras. I can now shoot well over 500 shots on one battery and as I have the battery grip and two additional batteries this can easily see me through a long weekend landscape photography shoot. The camera itself can also be charged by USB-C which is great as I have a ton of power banks lying around so I can just bring one or two power banks on my trips and charge all my devices including the camera.

Something that I am not so fond of is that Fuji does not include a proper charger in the box. Only a cheap looking Phone style USB charger and USB-C cable is included so you must charge the batteries up while in the camera. Not great if you need to charge batteries while using the camera. The same can be said of the batter grip as there is no way to charge this separately. You must attach it to the camera and then charge all 3 batteries together. Again, not really the best solution as it would be nice to be able to charge the batteries in the grip while using the camera. It’s not a big deal though because the batteries now easily get me through a day’s shooting and I can simply plug everything in to a power bank at night to charge them.

There are a few other additions to the XT4 which may be of interest to you but are not that significant for my use. One is the addition of Classic Chrome film simulation. This is a beautiful filmic looking preset that I find works very well for side lit scenes and Caucasian skin. However, as I shoot a lot of my portraits in Asia it doesn’t work so well for Asian skin tones, so I only tend to use it when I’m back in Europe.

Classic Chrome (used for this shot) suits Asian skintone better than the new Classic Neg but I tend to use one of the Pro Neg film simulations the most.
100% crop of above image using the 56mm 1.2@ 1.2, 1/125, ISO 160

The Fujifilm XT4 now also allows for 240 fps HD video capture but I must admit I have not used it thus far being primarily a stills shooter. The video specs of the XT4 are excellent and varied, offering a lot of options for professional video capture which I will be exploring more later in the year if I can get back to the UK once this damned pandemic is dealt with. The Eterna profile along with very good 10 bit 4k video means that the Xt4 is more than good enough for my video needs.

Image Quality

Finally, as promised here are some image quality samples for those of you who are unfamiliar with what the 26mp X-Trans sensor can produce. The image quality is basically unchanged from the XT3 and X-Pro 3. I own an X-Pro 3 and get exactly the same images from it as I do the XT4.

The AF performance and in particular face and eye detection is slightly improved in the XT4.

XF 55-200mm, F/7.1, 1/480, ISO 160
XF 56mm @ f/1.2, 1/4400, ISO 160

So why would I (and you) choose the Fujifilm XT4 over rivals such as the Sony A7II (which I have also owned)?

For me there are 3 main reasons.

Firstly, and most importantly (for me) the handling, ergonomics and joy of using the XT4 is beyond the A7III. The XT4 feels like a ‘real’ camera with its manual dials for ISO, shutter speed and aperture. The Sony feels like a smart phone on steroids and as a bit of a techno dinosaur I prefer the more analogue feel of Fujis. If I enjoy using a camera and it makes me feel inspired then I generally get better images with it.

Secondly, I wanted a rugged but lightweight camera system (note I said system) and while the XT4 may not be much smaller than the A7III/Z6/EOS R etc, when you combine it with the vast array of Fuji lenses (particularly the Zooms) then the kit as a whole is still significantly smaller than a full frame kit. My go to lenses for travel are the trio of 10-24mm, 18-55mm, 55-200mm and the 35mm f/2. This all fits easily in my bag ( Lowepro Flipside 400AW) with room for a spare body, batteries, filters, laptop, hard drives, mics, Mavic 2 Pro drone + 3x batteries and more.

You can build out quite a small full frame mirrorless kit but I always found it limiting to only stick to the smaller cheaper lenses and having used Sony cameras with the GM series of lenses in the past I found them unbalanced and unwieldy on the A7 series bodes. I understand why many use them and would never discourage that but for me the Fuji system does what I want at a size and weight that I am happy with.

Finally, an important factor in any decision is price. The Fuji system has options from cheap to expensive but overall, the cost of building a comprehensive kit around Fuji is cheaper than that of full frame and IMO the difference in image quality between APS-C and full frame is not worth the additional cost. In fact, I skipped it altogether and also added a medium format camera to my kit for those occasions where I need it.


For an alternative view from a talented photographer check out Jonas Rask’s Fuji XT4 article


5 Reasons to buy the Fujfilm XT4

Olympus’ recent announcement that they were selling their camera business gave me the final push (which I’d been considering anyway) to sell off the last of my Micro 43 gear and switch to one system.

I am planning to get back to much more photography than I have been able to over the last few years now that my daughter is growing up.

As you probably know I have the chance to test out all the latest gear quite regularly from all the main manufacturers.

In the end I made the move to Fuji. I have been a Fuji user on and off since 2013 with the X-Pro1 and have used all their models since. However the XT4 has finally banished any last remaining issue that I had with the Fuji XT3.

The inclusion of IBIS was a big one for me as well as a few other important upgrades that I go through in my latest Youtube video.

Speaking of Youtube, now that I have more free time I will be dedicating quite a lot of it this year to producing content on there. Not only will I include reviews of all the current kit that I am using but I will also delve more into the how and why of photography, take trips (once this pandemic finally leaves us) and vlog about my various phtoographic exploits. I hope you will join me there.


Panasonic GX9 vs Olympus OMD EM5 III vs Fuji XT30

In this post I’m going to compare the Panasonic GX9 vs Olympus OMD EM5 III vs Fuji Xt30. As you probably know, I’ve shot Panasonic, Olympus and Fuji cameras for years now, going back to the the Panasonic G3, EM5 and X Pro1. I want a compact and lightweight camera that I can use mainly with prime lenses for some projects that I have planned in the Philippines later in the year. The project will be documentary and involve lots of candid portraits as well as some street photography. I plan to use whichever camera I choose with a (35mm equivalent focal lengths) 50mm and 85 ish mm prime lenses as those are my preferred focal lengths for the kind of shooting that I have planned. On the Panasonic and Olympus I shot the Pana-Leica 25mm 1.4,Olympus 45mm 1.2 and Sigma 56mm 1.4 while on the Fuji I paired it with the 35mm 1.4. I had planned on using the 56mm 1.2 as well but in the end couldn’t get hold of one in time for my testing but the AF performance is pretty much on par with the Fuji 35mm lens and having owned the 56mm previously I know how it performs.


Firstly let me say that all the specs are available online so I’m not going to go through them all here. I’ll just talk about those that mattered to me for the project that I have planned. Those being image quality, AF, handling and performance.

While the GX9 and EM5 III uses a 20mp Micro 43 sensor the Fuji XT30 makes use of the larger 26mp APS-C sensor found in the XT3 so it should be a no brainer that the image coming out of the Fuji is better and it performs better when pushing your ISO higher. The thing is that when reading forums on the internet they would lead you to believe that the difference is night and day and this simply is not the case. Yes the Fuji is slightly better once you get up to 3200+ ISO but the differences wont be enough to make or break an image. For me the more interesting question was about the colour each camera produced and I was particularly interested in the Acros black and white profile of the XT30 as a lot of my project will be shot in black and white. Quite frankly I chose the XT30 as one of the most affordable ways to get the Acros profile.  In my opinion the image quality produced by all the cameras is good enough for what I had in mind.


Fuji are heralded within the media for being excellent for portraits, skin tones and the Acros profile and in a lot of situations I know why. I love the organic look of the colours coming off the X-Trans sensor and under the right lighting conditions the Acros profile produces some beautiful black and white images. However sometimes the colours can feel just a little flat while the Panasonic and Olympus in my opinion actually produce more pleasing colours more of the time. I am a big fan of the colours that both Panasonic and Olympus cameras put out SOOC. For me they win when shooting colour images but the Fuji does well for black and white work. This is why I bought an XT 30 just for this project. However I like the Fuji and Panasonic black and white rendering equally and it really depends upon the subject and light as to which is better in a given situation.

In terms of handling all the cameras are small, lightweight and discreet. They are quick in use and it is easy to quickly change settings on them. I prefer that the Olympus has a separate door for memory cards and I still prefer the PASM system employed by virtually every camera manufacturer rather than the separate dials for shutter speed employed by Fuji. (note the XT30 has a shutter speed dial which when using most Fuji lenses combines with the Aperture ring to give control over exposure). The XT30 does not have and ISO dial unlike its big brother the XT3.

All the cameras feel well built although I’d have to give the nod to the GX9 and Em5III (although I have heard issues reported around the strength of the tripod plate on the EM5II) as they just feel a little higher quality finish and of course the Em5III is weather sealed.

I had fully expected to love the little Fuji XT30 but there were 2 major issues for me once I had a little time with the camera. Firstly, I wanted to shoot the 35mm 1.4 and 56mm 1.2 for my project and quite frankly the AF motors on these lenses still proved to be pretty poor. I had hoped that with the latest generation of camera bodies the AF when using these lenses would have improved but unfortunately (and this is no fault of the XT30’s) it hasn’t. Now I know that a lot of Fuji users love these lenses and in terms of their image quality, yes they are gems but the problem I had while testing the gear out (on not very trying subjects) was that it took multiple shot to get perfect focus. No, it wasn’t a bad copy of the lens, this is exactly how I remember my previous version being as well. I guess it is my own fault for hoping for an improvement that simply can’t be provided by a newer camera. These lenses desperately need updating and I really hope Fuji is working on this as their more modern lenses perform much faster. However it is these lenses that I particularly wanted to use. I’m not interested in the f/2 primes as I’m giving up some of the benefits of that APS-C sensor when shooting with them. In all honesty I like the ergonomics and handling of the EM5 III the most, so unless the XT30 is going to give me tangible benefits (which it would if these lenses auto focussed quickly enough) over it then I’m not going to choose it. The EM5 III is simply more fun and gives me more confidence that I can nail the focus every time.


Fuji Acros ISO 4000

While the Fuji XT-30 does offer slightly improved High ISO performance the differences are minimal and I’d still place my limit of acceptable IQ for portraits at ISO 3200, exactly the same as the Micro 43 cameras.

Olympus EM5III Monochrome + Green filter , ISO 2000
GX9 , L Monochrome Pofile, ISO 200

The second major issue (and one which even had me and my wife spend and evening trying to figure out) was the Fuji App to transfer images to your mobile device. I have used this app before, along with the ones form every other major camera manufacturer (except Canon). The best ones are from Olympus and Panasonic, Sony’s is fine too and Nikon’s although temperamental usually works. Well this Fuji App is a complete and utter bag of S**t. I spent hours trying to get it to connect to my phone, my wifes phone, my tablet and in the end gave up. When I’m out in the middle of nowhere taking photos and I want to quickly transfer some images then this is a big no no for Fuji. I didn’t previously have this issue when I owned the XT2 so I can only assume that the updated app is either useless, has compatibility issues or it’s the XT30’s fault. Either way in the end no matter how beautiful the Acros black and white images were, far too many were out of focus and when they were in focus the app made viewing them on my mobile device impossible. The Fuji is sadly out of the race and has been sent back.. As you saw in my Olympus OMD EM5 III Review this camera does everything that 90% of people will need it to do with no fuss. It makes photography easy and fun and dare I say it, quite cool too.


However I already own the Panasonic GX9 and a GH5 so is the Olympus at approximatley £1000 twice as good as the Panasonic GX9 which can be had for under £500 (as of early 2020)?


In the Olympus’ favour it has slightly better IBIS, is weather sealed, has a better viewfinder and offers Hi Res mode as well as the useful long exposure modes such as Live Bulb and Live view. In the Panasonic’s favour for me is the fact that it uses the same menu system and has the same colour profile as my existing GH5 and so using the two together would be a more seemless experience and mean my lazy ass doesn’t have to memorise two menu systems. It is of course half the price.


When I wrote my Olympus EM5III review it was before the Coronoavirus Pandemic had really hit the UK hard. Money and business was quite good and I could afford the additional cost of the EM5III over the GX9. However as I sit here writing this (early April) the UK economy has basically shut down, business has dried up and I am now putting a much higher priority on bang for buck to ensure that I get the most out of any investment that I make in to a camera or system. This puts cost way higher up my list of priorities than would previously have been the case and I’m sure like many photographers out there I am now really asking myself the question, do I honestly need these extra features and are they really going to make a difference to my work and earning potential.


For me, in the end it comes down to the image I can produce. Yes it is nice to have the better viewfinder but the one in the GX9 does not hinder me from getting the shot. I also quite like the tilt mechanism on it. Yes, hi res mode would be nice to have and I can see myself using it quite a lot for landscapes but the projects that I have lined up will be fine with 20mp of resolution. Am I going to suddenly start doing a lot of long exposure photography to make use of live bulb and live view…..If I’m bluntly honest with myself then no, that just isn’t going to happen.

Does my camera need to be weather sealed? Well a lot of us like to kid ourselves that a certain specification is an absolute must. I hear people all the time saying that weather sealing is absolutely essential. I don’t buy it for the most part. I used to live in the Outer hebrides, a place where the weather could not be more challenging to a photographer. My cameras back then didn’t offer top notch weather sealing and you know what I did when the heavens opened… I popped my camera back in my camera bag and waited for the torrential wind blasted downpour to pass. Just before and just after the storm is the best time to photograph anyway not during it. Even if the cameras were weather sealed like a tank the front element of the lens woud be covered in rain and ruin any image. The philippinnes, just like the Outer Hebrides is prone to sudden torrential downpours but for the subjects that I plan on shooting it is irrelevant as I doubt many portrait subjects will be willing to stand out in the rain while I photograph them. Long story short, weather sealing is nice to have but not essential for me.


Both the GX9 and EM5 III have fast enough AF speed for my needs. Yes the Olympus may be a little better at tracking thanks to its phase detect Af points but it doesn’t make a difference for what I shoot as the GX9 is quick to focus and has decent face and eye detect AF.

Conclusion

The crux of the matter comes down to which camera offers the features that I need in the cheapest package and this is where the GX9 delivers in spades. IMO it is probably the best value camera in the photographic universe at the moment.

In terms of output it is virtually identical to the Olympus EM5 III however it actually bests it in my opinion in one area that is vital to my project. The black and white profiles of the latest generation of Panasonic cameras and in particular L Monochrome D is just about my favourite black and white profile of any camera.


Despite wanting the Fuji XT30’s black and white output the |fuji sytem currently has too many compromises to work for me (Slow AF, No IBIS, Poor Wifi App, No PASM). Despite quite liking a lot of the EM5III features I don’t really need them. My Panasonic GX9 takes beautiful black and white images (particularly in the L Mono and L Mono D profile) and offers everything that I need in a small lightweight package. It doesn’t hurt that it looks beautiful too. So I’ll be using it alongside my GH5 for my projects this year.


Olympus OMD EM5 III Review


Today I am going to share my Olympus OMD EM5 III review with you.

I have been waiting for what seems like an age for the release of the Olympus OMD EM5 mark III camera. As an avid Olympus user over the years I have been fortunate enough to try out all of their top tier cameras since the original EM5 right through to the EM1X. I used the EM5 II as my main camera for around a year and you can see my review of that here 

Yet somehow while I was caught up in our recent house move from the Philippines to the UK I missed the official release. It was only when I got back to the UK and had time to settle that I picked up that the third iteration of the Olympus EM5 had been announced, released and was on sale. The orignal EM5 was the camera that lured me away from shooting DSLR’s for my professional work way back in 2012. The competition has come a long way since then with Sony flooding the market with 35mm sensor sized options and Fuji providing attractive APS-C options.


I had high hopes that the OMD EM5 III would bring together everything I love about mirrorless cameras, small form factor, beautiful design, advanced features. ease of shooting and hopefully, an upgraded sensor.

On reading the specs there are two ways to look at it… We didn’t get a brand new sensor from Olympus as some had hoped but we did get the excellent one out of the EM1 II. This along with phase detect auto focus, improved image stabilisation, OLED viewfinder, 4k video and that beautiful form factor and design was enough to have me clicking the buy now button and ordering one to test.

For this Olympus OMD EM5 III review I have purchased the camera myself and will be using it in depth to see if the EM5 III is worth the money and can compete in todays even more competitive market place.

Olympus OMD EM5 III Review – Handling

The new layout on the Olympus OMD EM5 III

The Olympus EM5 and mark II had a metal construction which gave them a really substantial feel in the hand. Yes they were tiny but they felt well built and easily capable of surviving the daily scrapes our gear sometimes has to deal with. The new Olympus EM5 III has dropped the metal construction in favour of a lighter poly-carbonite shell. I must admit this had me a little concerned when I first read it as I wondered if they had shifted the EM5 series further down their product lineup and were aiming it at a different, less demanding audience.

Well in all honesty I prefer the feel of the mark III over my original and mark II versions. It feels noticeably lighter at 414g down from the mark II at 469g. It also feels a little smaller but it is actually more comfortable to hold thanks to a thumb rest that protrudes more from the back of the body. This allows for great purchase on the camera and I have no issues with the balance of the camera when combined with larger Olympus lenses like the 12-40mm Pro. There is an optional grip which would be welcome if using the pro telephoto lenses although I note that a full battery grip is no longer going to be offered as an optional accessory. I presume because Olympus wants you to purchase an EM1 series body if you require this functionality. I can understand that and although I would like the option of a battery grip I, like most other buyers probably value the light weight and compact nature of the EM5 bodies more.

When I did my Olympus OMD EM5 III unboxing video I was so interested in the feel of the camera that I didn’t even initially notice some standout changes that Olympus has made to the body of this EM5 III. I’ll go over these now in this Olympus EM5 III review.

Firstly, the control dial is now on the right hand side freeing up space for dedicated buttons to select the shutter mode (single, burst, Timer etc) and another that by default switches the LCD display from showing a live display or the Olympus Super Control panel. Damn, no single handed switching the camera on then.. A quick play around in the menus and I found my trusty option to use the function lever to turn the camera on and off, problem solved.

Another addition that I’m happy to see is a dedicated ISO button just to the right of the thumb rest. It’s not ideally position with my thumb (at least) having to stretch slightly to reach it but it works and its there, so again I’m pretty happy.

For any existing Olympus users the handling will be very familiar and now more in line with that found on the EM1 series bodies which will offer better continuity when switching between bodies. I can envisage people (myself included) using the EM5 III when they want to be lightweight and discreet (think street photography, candid portraits, family outings, long treks etc) and the EM1 series body with larger lenses for more serious work.

The Olympus EM5 III still has a 3 inch fully articulating screen (unchanged from the previous model) and it does its job more than adequately for my needs. Yes there are larger screens with more resolution available but is it really needed? In my eyes not really. Yes, more is often a good thing but this screen shows me the information I need quickly and clearly.

One change on the EM5 III that I do really appreciate is the new 2.36 million dot EVF. Although the magnification has decreased slightly (0.69x ) it is a vast improvement over the old model and provides a clear rich image. Yes higher resolution EVF’s are available on more expensive models from other brands but while these are nice I honestly don’t see them as essential as long as they are good enough to clearly frame your shots. One thing to note for those among us that wear glasses is the 27mm eye point.

Overall the handling of the Olympus OMD EM5 Mark 3 is almost exactly what I want in a small mirrorless body. Its buttons offer good tactile feedback (no more squidgy buttons here) and the front and rear control dials are the best in the business offering just the right amount of resistance to feel solid and assured in use.

Video

I now do quite a lot of video both in my work and for my Youtube channels and I’m pleased to see that Olympus kept the mic input on the EM5 III. This along with the ability to record in 4K at 24 and 30 FPS, as well as 120 FPS in 1080 make it a pretty good option for casual video.

Having looked at the video quality produced by the EM5 III I would be quite happy using it for my Youtube channels. Combined with the excellent IBIS as well as vastly improved video AF I found it easy to get good results straight out of camera.

The colours are beautiful as I would expect from Olympus and I believe it would be more than capable of putting together very nice looking travel videos and vlogs, aided by that fully articulating screen.

I currently use a GH5 for video work which as we all know has a plethora of options but for less demanding users I believe the EM5 III will be more than good enough in terms of output quality, colour and usability as long as you don’t need 4k60 which is sadly missing.

The only issue I would mention is that the headline bit rate of 237mbps is only available for cinema 4k (including fast motion up to 8x speed) and then drops down to 102mbps for 4k at 24,25 and 30 FPS.

If slow motion is your thing the EM5 III can shoot at up to 120FPS in 1080 but the bit rates drop off significantly from the numbers above which could cause quality issues, particularly if you may grade the footage. The 120 FPS high speed option shot and re-timed in camera only offers 26 MBPS.

The highest bit rate when shooting in IPB is 52 MBPS for 1080 , regardless whether the frame rate is 24, 25, 30, 50 or 60. You can shoot 24, 25 and 30 FPS footage in All Intra at 102Mbps.

Sample video will be available once I upload my Video review to Youtube.

Auto focus

Olympus have put the sensor (including Phase detection AF) from the EM1 II into the EM5 III and it really does show. Now let me just clarify one thing, I am not a sports shooter. I hate firing away like a madman in the hope that if I spray enough bullets I’ll hit the target. Not to mention I don’t have the will to go through thousands of pictures just to find the one good one. So I have not tested the EM5 III AF for sports or birds in flight which are arguably the most demanding tasks for an auto focus system.

However I have shot a variety of subjects from portraits to my 3 year old daughter tearing around on her bike.

Single AF, S-AF in Olympus’ language is as fast as the fastest cameras out there. If you can’t get in focus shots with this camera then I’m afraid it’s not me, it’s you says the EM5 III. The focus is snappy, assured and never skips a beat. That’s to be expected these days although some do better than others and of the cameras I have used Olympus is easily up there with the best for single AF.

The interesting thing with the EM5 III is that it now has phase detect AF for the first time so in theory its continuous AF and tracking modes should be vastly improved over its predecessor. In short yes they are.

Shooting multiple portraits of my wife using eye AF and C-AF the camera locks on to her face and eyes and nails the focus almost every time. It is also doing a better job of following the subjects face even when they are not face on to the camera.

I also tested out the tracking AF using my daughter riding her push bike. The results were pretty impressive, especially when compared with previous generations of the EM5.

With the subject riding straight towards me at a jogging pace the camera picked up focus immediately and followed her through until she filled the frame and exited to the side. The last couple of images were out of focus but 80% of the remaining series were all perfectly sharp with 15% being acceptably so and just 5% being unusable.

When tracking a subject across the screen the results are better still. In fact they were all perfectly sharp.

So for normal use photographing people, kids, pets, the Olympus EM5 III is more than up to the job in terms of AF. The only issue and one I would like to see improved in a firmware update is that when several faces are in the scene I couldn’t find a way to select which face to focus on. The AF is also very usable for video and certainly better than my GH5.

Olympus OMD EM5 III Review – Image Quality

I will add a few test shots below for those of you who want to compare ISO in a more controlled manner but for the most part I find that the biggest test for a sensor in terms of high ISO performance is capturing skin tones. The smooth skin of a models face really does show up issues when using higher ISO’s and this is something that the EM5 II had started to fall significantly behind with compared to the competition.

100% Crop , 1/125/ f/1.2, ISO 1250 shot with the Olympus 45mm 1.2 Pro lens
1/125 f/1.6, ISO 2000

Of course a Micro 43 sensor does have an inherent disadvantage in low light performance due to its smaller size compared with APS-C and 35mm. However whenever I have tested this I am always surprised just how close to APS-C it gets. Don’t get me wrong if you want and need killer low light performance then you need a larger sensor but I am yet to produce an image at ISO 3200 or above on any camera which I would consider a true keeper. If an image is that important then I am generally shooting at lower ISO or controlling the light. I understand that some people (documentary photographers, nightlife and wedding photographers etc) do genuinely need the best possible high ISO performance but for the rest of us, is a very usable ISO 6400 not enough? If it is dark enough to need ISO 12800 or more then I honestly doubt the image is going to be that good anyway. I know I will get some angry responses and justifications to that last comment but for how and what I want to shoot I rarely go above ISO 1600 and if it’s a landscape I’m at base ISO anyway.

1/400, f/1.2, ISO 200

With that said I am pretty happy with the high ISO performance of the Olympus OMD EM5 III. ISO 3200 is very good and 6400 looks very usable too. I would even say it is a little better than my EM1 II at high ISO as the 12800 shot below doesn’t fall apart as badly on the EM5 III as it has on my previous Olympus cameras. The magenta cast that the EM1 II sometimes suffered with at high ISO’s is also no longer present on the EM5 III. Below I shot an image in near darkness as I prefer to test ISO performance like this rather than shooting in daylight and raising the ISO for the sake of it.

The Test scene how it looked to my eye.
ISO 200
ISO 200 100% Crop, ORF File Straight conversion with no noise reduction. Processed in Lightroom CC
ISO 400
ISO 400 100% Crop
ISO 800
ISO 800 , 100% Crop
ISO 1600
ISO 1600, 100% Crop
ISO 3200
ISO 3200, 100% Crop
ISO 6400
ISO 6400, 100% Crop
ISO 12800
ISO 12800, 100% Crop
ISO 25600
ISO 25600, 100% Crop

To be perfectly honest, this is the first time I have been totally happy with ISO 6400 on the Micro 43 platform. I always thought it was usable with a bit of work in post production but with the Olympus EM5 III it has now edged over into perfectly satisfactory and ISO 3200 looks very clean. Of course when shooting with the EM5 III you’re only going to need to use those higher ISO values if you need to use a faster shutter speed to stop action. Otherwise you can hand hold this camera in almost any situation thanks to the incredible in body  image stabilisation. All the test shots above were shot handheld with the 45mm Pro lens. The ISO 200 shot used a shutter speed of 1 second and was almost perfectly sharp. That would usually require a shutter speed of 1/100th to be sharp. That’s over 6 stops of image stabilisation working right there and to be honest I didn’t bother about my technique, I have so much faith in Olympus’ IBIS that I just fired away without really thinking about it. It is unlike any other IBIS system I have ever used and yes I have owned the Panasonic G9 but the EM5 III, EM1X and the EM1 II are all much better in my opinion. I know some test results put them close but that was not my personal experience.

So if people say that you need a large sensor to shoot in low light I would say it depends entirely upon what you are shooting. Yes there are scenarios where the larger sensor will be of benefit if you are shooting moving subjects and need to freeze the action but for anything else the EM5 III can shoot at ISO 200 and give you great results.

One thing I had noticed on the EM1 II and previous Olympus bodies that I have owned (so most of the higher end ones) is that the red channel was prone to becoming over saturated and clipping. I can say that this issue seems to have been resolved on the EM5 III.

The red channel no longer clips when shooting super saturated red colours such as this rose.

This is especially true if you shoot in Raw rather than JPEG as the raw files hold substantially more detail and information as you can see below.

SOOC JPEG , Natural picture profile, 100% crop shot at 1/13, f/4, ISO 200. Shot on a tripod.
Raw file with no adjustments except +25 sharpening in Lightroom CC. 1/13, f/4, ISO 200. This is the matching raw file to the above Jpeg both shot in raw + Jpeg Large Fine mode.

If you want to see all the full resolution images from this review then they are all available over on my Flickr page.

As you can see from the above image the raw files are holding substantially more detail and colour information. When I zoom in 100% on the Jpeg file here I can just see a few areas where the red channel is starting to clip slightly. However there are no such issues in the raw file. The raw file also shows more fine detail such as the veins of the petals which are not visible in the Jpeg. It should be noted that I turned in camera noise reduction down to the minimum setting but it can also be turned off altogether.

High resolution mode

The Olympus EM5 III now gives us 80mp raw files and 50mp Jpegs in high resolution mode thanks to the new 20mp sensor inside the camera.

At first glance the hi res shots show a noticeable improvement in detail but is this simply due to the larger file size?

I wanted to see how they compared with a standard raw file that was up-rezzed on my PC to match the file size of the in camera hi resolution image.

Hi Res Shot 100% crop from 80mp raw file with no adjustments.
Standard Raw file up rezzed in Adobe to match the in camera hi resolution image.

The in camera hi resolution image contains more genuine detail than the standard raw file up rezzed to match. The other main benefit that is quite obvious is that the in camera hi resolution image is giving a noise benefit too. Olympus themselves claim 2 stops improvement when using the high resolution mode. I believe this to be pretty accurate. The file is cleaner and contains more detail so if you really want to get the best output possible then it is worth using the high resolution mode. Just make sure that you take the time to ensure you are using the camera on a rock steady tripod and use a shutter delay. My first attempt to capture this hi res image resulted in softness caused by the vibrations when I pressed the shutter release. A delay of 8 seconds was sufficient to get perfectly sharp images.

I still have to test the hi resolution mode for landscapes to see if it deals with movement any better than previous generations. I’ll report back once I have thoroughly tested it.

Olympus OMD EM5 Mark 3 – Conclusion

The Olympus OMD EM5 III has been a long time coming so was it worth the wait? On the one hand if you look at the technical specifications and price some may argue that there are no standout features in such a competitive marketplace. However it is only when you actually get the camera in your hands and use it that you can appreciate all the little improvements that in the end add up to one of the best handling and performing mirror-less cameras on the market. Let’s not forget that Olympus’ IBIS is definitely still the best available.

The build quality still feels reassuringly good, the new thumb rest gives just that little more purchase to make it more comfortable to shoot with. The new EVF is crisp and clear and little additions such as the dedicated ISO button improve the handling to the point that this camera simply gets out of your way and lets you shoot. For me this is more important than an extra stop of dynamic range, a few more megapixels and being able to fire off a million shots a second. That is just the way I prefer to shoot though. I prioritise the experience when using a camera as long as it is able to give me the end results that I need.

In the last year I have heard quite a few people predicting the demise of Micro 43 and in particular Olympus, citing Sony’s A7 line as being far superior. I don’t deny that the Sony A7 series are great cameras, I have owned the A7R, A7II, A7R2, A7III and A7rIII.

While the Sony A7 series bodies are in the same size and weight bracket as the higher end Micro 43 offerings like the EM1 II and GH5 the professional grade lenses are no smaller than those on full frame DSLR’s. Yes they will get you better low light performance and more megapixels to play with and if you genuinely need those things then no doubt you will already know so.

However for the rest of us who want a fast responsive camera with good AF, a big step up in image quality from your phone, more features than pretty much any other camera on the market and a range of high quality lenses from super wide angle to super telephoto then I think the EM5 III offers that. All wrapped up in a lightweight package that you will be much more likely to carry than a bulky DSLR.. I know that I will take my Micro 43 cameras out with me on trips where I would leave the Sony cameras behind and in the end as the cliche goes, it’s the camera that you have with you that’s the best.

I get to try out a lot of cameras and I usually know which ones I would be happy to keep pretty quickly. For me the Olympus OM-D E-M5 III ticks all the boxes for what I want in a camera and I’ll be keeping mine for some time to come. In future articles on this website and videos on my Youtube channel I will be putting the EM5 III up against my Panasonic GX9 and a Fuji XT30 so be sure to check back soon for those comparisons. I’m also hoping to pick up the recently announced EM1 III and Fuji XT4 to compare those two models.

I’ll be updating this page from time to time when I have more sample images and hopefully get a chance to shoot some proper landscapes (if I ever get the time) over the coming months. I hope this Olympus OMD EM5 III review has been useful for you. Now get out and shoot.

Sony A7III Video Review

Here is a link to my video review of the Sony A7III camera. If you are looking for more information on the Sony A7IV then I have just posted a setup and best settings guide

I have been using the Sony A7III since it was released along with the Sony 50mm 1.8, Zeiss 55mm 1.8, Sony 85mm 1.8 and the Sony 16-35mm f/4 lenses. I’m now in the process of testing both the Panasonic G9, GX9 and Nikon Z6 cameras and will be posting reviews of them once I have had enough time to do them justice.

Sony A7R II vs Olympus OMD EM1 II Depth of Field Comparison

Sony A7R II vs Olympus OMD EM1 II Depth of Field Comparison

I just took delivery of a Sony A7R II yesterday with the Zeiss 55mm f/1.8 lens. Part of my decision to buy this combination was to supplement my Olympus OMD EM1 II with a camera with a full frame sensor as I believe Micro 4/3 and full frame compliment each other as systems very well. The idea being that the Olympus will be my everyday camera and the Sony will allow me to get more subject isolation and better low light performance when I need it.

The difference between micro 4/3 and APS-C is so negligible that I don’t see the benefit of owning both for my uses.

Anyway I thought it would be interesting to do a quick test to see the difference between the two when it comes to subject separation.

I shot both on a tripod from the exact same location. The Zeiss is a 55mm lens whereas the Olympus equates to roughly 50mm so the field of view is not exactly the same with the Zeiss being a bit narrower. The Sony was paired with the Zeiss 55mm f/1.8 and the Olympus with the 25mm f/1.2 Pro (see my review here ).

So here are both shots wide open.

The Sony A7R II + 55mm Zeiss lens wide open
Olympus OMD EM1 ii + 25mm 1.2 Pro wide open

The Sony is definitely doing a better job of isolating the subject and that is no surprise as the 25mm 1.2 on the Olympus is roughly equivalent to a 50mm f/2.4 on full frame in terms of depth of field and field of view. Part of the difference can be put down to the longer focal length of the Zeiss lens but even then here are the things to look at that highlight the differences.


Look at the detail in the brown unit to the left of the top of the lens. The Olympus is picking up more texture and details whereas the Sony has blown most of that into smooth out of focus rendering.

Secondly the light sphere immediately left of the focus markings on the lens is much more in focus on the Olympus shot than the Sony one.

So even wide open and with a larger aperture the Olympus 25mm 1.2 can’t quite match the Sony with a 1.8 lens.

Here are  the Olympus and Sony both at f/1.8 side by side in Lightroom so you can directly compare like for like what you would get when shooting at the same apertures on different systems.

Sony (left) and Olympus (right) both at f/1.8


So as you can see the Sony definitely offers an advantage when you want to isolate your subject. Just as expected. You can of course also buy lenses with a larger aperture for the Sony system which will widen the gap further. However I have no intention of buying those lenses, not because of the price (which is expensive) but because I don’t want to imbalance the camera by putting on huge lenses that will make the whole setup incredibly front heavy.


So if you want that creamy shallow depth of field look then it’s a no brainer right? Get full frame….. Or is it.


One thing to note is that these Olympus Pro line of lenses have a trick up their sleeve that can level the playing field somewhat if you are not constrained in your shooting position.

They can focus incredibly closely.

All the shots above are taken from the closest focusing distance of the Sony Zeiss 55mm 1.8. In these circumstances the full frame Sony clearly does better. However take a look below at just how close the Olympus 25mm 1.2 Pro can focus. The lens hood was nearly touching the subject when I too this.

The Olympus 25mm 1.2 and all the Pro lenses can focus really close.


I’m not arguing that one is better than the other here. For some things the Sony will be better and for others the Olympus. That is why I bought the Sony A7Rii to compliment, not replace my Olympus OMD EM1 ii. For example when I shoot the Olympus 25mm 1.2 Pro I get the light gathering of a 1.2 lens but I gain a little extra depth of field which can be useful to ensure enough of your subject is in focus. More depth of field can be an advantage at times.

The Sony will of course give me better low light performance, a little more dynamic range and the ability to print gallery sized prints with more detail but if anyone tells you that Micro 4/3 is not capable of producing shallow depth of field images then you can safely ignore them as they clearly haven’t used lenses like the 25mm 1.2(review here ), 45mm 1.2 (review coming soon) and 75mm 1.8 (review here )from Olympus.

Olympus 25mm 1.8 Review

Olympus 25mm 1.8 Review

The Olympus 25mm f/1.8 is a premium fast aperture prime lens from Olympus. It is available in either silver or black. I have the black version and have been using it on my OMD EM1 ii.

Olympus 25mm 1.8 Review – Construction and Handling

The Olympus 25mm f1.8 is constructed using high quality plastics. It feels nicely built and not cheap like Canon’s nifty 50 lens. The lens makes for a very light and compact combination even on Olympus’ larger bodes such as the OMD EM1 ii.

I have been out this morning for a Sunday stroll with this combination and it feels so light and compact that I hardly even noticed that I was carrying the camera.

Thankfully Olympus supply this lens with a lens hood although I haven’t used it much but it is certainly right and nice that Olympus saw fit to include a lens hood with this lens.

In terms of construction it feels more solid and better made than the cheaper kit zooms but it is not up to the standards of the Olympus 75mm 1.8 or the pro grade lenses but then this lens is not in the same price category coming in at under £300 on Amazon UK.

From left to right Olympus 25mm 1.8, 25mm 1.2, 75mm 1.8

Autofocus performance of this lens is nothing short of excellent. It is incredibly quick to focus and silent too. It focuses instantaneously and is very accurate. Whether the scene is front lit, back-lit or when using it in low light the auto focus performance is a s good as any lens in the system. It is noticeably quicker to focus than the Panasonic 25mm 1.4 for instance and as quick as the Olympus 25mm 1.2 Pro. Both of which are more expensive.

Olympus 25mm 1.8 Review – Image Quality

The Olympus 25mm 1.8 doesn’t suffer from any noticeable distortion. It is also highly resistant to lens flare, even when pointing it directly at the Sun as I did this morning.

It doesn’t suffer with CA in high contrast situations and in fact having tested it over and over again I am very impressed with the performance of this lens in every aspect.

The lens also focuses incredibly closely at 25cm. Combine this with the f/1.8 aperture and you ave the ability to really throw the background out of focus to create some nice bokeh effects.

The Olympus 25mm 1.8 focuses incredibly close.


100% crop at f/1.8
100% crop at f/2


100% crop at f/2.8

The lens is sharp wide open and doesn’t really show much improvement when stopped down further. Again the performance of this lens is excellent.

Olympus 25mm 1.8 Review – Conclusion

There are now a lot of choices in the Micro 4/3 system for this focal length. I currently have 3 25mm lenses, the Pana-Leica 25mm 1.4, Olympus 25mm 1.2 Pro (see my review here)  and this lens. So which one should you choose?

The performance of all 3 lenses is stellar, however the price points vary so is it worth paying more for the other the lenses.

In terms of optical performance they are all excellent. Only the Panasonic lens suffering slightly with CA. All are sharp wide open. The Olympus 25mm 1.8 is the cheapest option and if you have an Olympus camera I would recommend it if you don’t need weather-sealing and the 1.8 aperture is sufficient for your needs. It is also the lightest of the 3 lenses and makes a great walk around package even with my OMD EM1 ii. It is also small enough to carry in a pocket and light enough to sling in your camera bag as a just in case you need it lens.

Of the 3 lenses I would say it offers the best price/performance ratio and is the one I would recommend to most people. It really is a fantastic little lens and its performance is so close to the 25mm 1.2 optically that unless you really need f/1.2 or weather-sealing then it is hard to justify the additional cost of the Pro lens.

On an Olympus camera I also prefer the handling and auto focus performance to the Pana Leica 1.4.

Exit mobile version